The Macintosh SE/30, released in 1989, is widely considered the finest of Apple’s compact Macs. A Motorola 68030 running at 16 MHz, a 9-inch one-bit CRT, and a beige case that sits on a shelf with more personality than most machines built today. It was an engineer’s Mac, and to this day it runs nearly every classic Mac application ever written. But like all machines of that era, time is taking its toll. Capacitors leak, PRAM batteries corrode, analog boards drift, and CRTs slowly lose their focus.
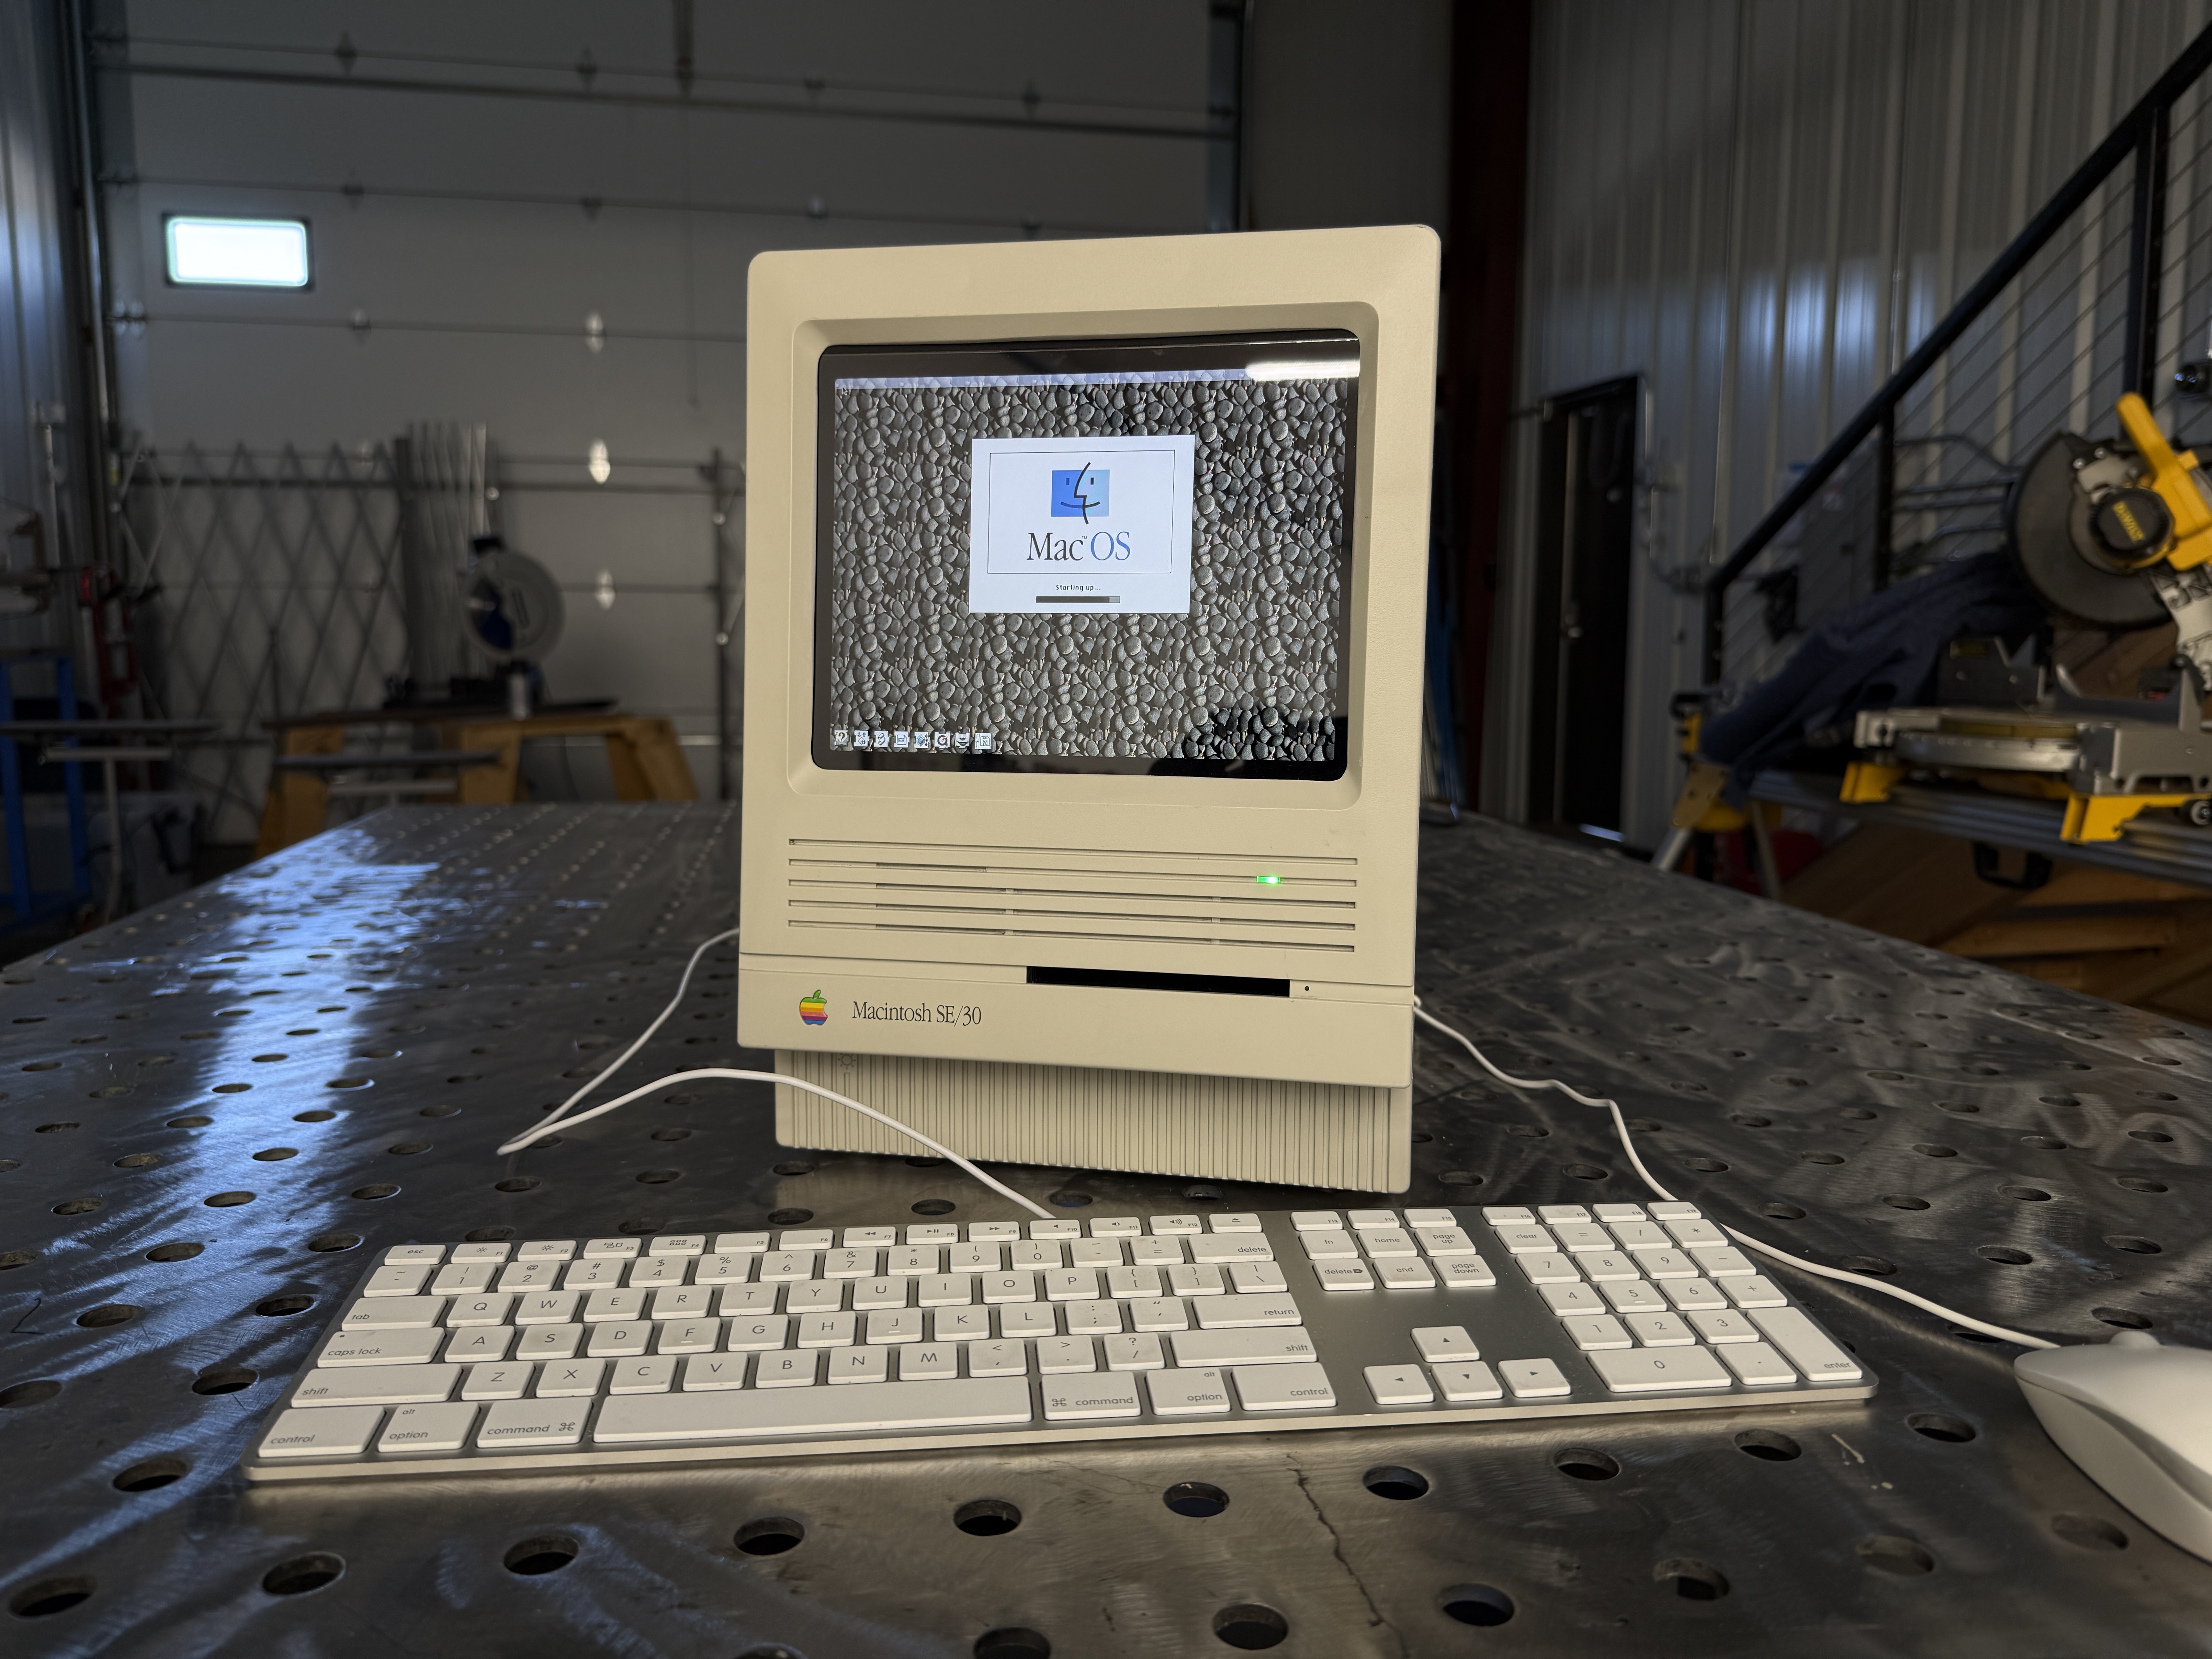
This project takes an SE/30 case that couldn’t be saved and reimagines it as a modern, color, silent, and nearly featherweight machine powered by a Raspberry Pi 4 running Mini vMac. It lives next to the fully restored SE/30 on the shelf, and it has become the machine I reach for whenever I want to use classic Mac software. An homage that also happens to be useful.
Backstory
In my pursuit to restore a classic Macintosh SE/30, I ended up buying two broken boxes on eBay. The first one arrived and partially worked, which gave me false hope. I soon discovered that a recap alone wasn’t going to be enough. Electrolyte from a failed capacitor had crept across the logic board and eaten the traces around the SCSI chip. After a lot of trial and error I determined the board was beyond my ability to save. The PSU and case were in fine shape though, so I set them aside to live another day.
I eventually tracked down a second SE/30 and was able to restore that one completely. Between the two purchases I now had an extra case, an extra CRT, and a sturdy PSU sitting on the shelf looking for a purpose. It felt wrong to toss them, and it felt equally wrong to let them gather dust. The idea for a reimagined SE/30 started there.
The Original Idea: Pi + Original CRT
My first plan was to use a Raspberry Pi 4 as the emulator and drive the original 9-inch SE/30 CRT directly. There is a small community of people who have done this successfully, and there are composite-to-SE/30-analog adapters and carefully crafted video overlays floating around the forums. After a few weeks of breadboarding and measuring I could get an image on the CRT, but I could never get it pixel-perfect. There was always a slight horizontal wobble or a sync issue that only showed up once the picture got busy.
I also had a nagging concern that I would spend months making an old, fragile CRT work only to have it fail six months later. The whole point of this build was to make something that would outlast the original, not share its problems. So I set the CRT quest aside and decided to go in a different direction entirely. While I was at it, I would do something the original SE/30 could never do: make it color.
Fitting a Flat Panel in a Curved Bezel
The SE/30 front bezel was engineered around a curved CRT, not a flat panel. Most builds I’d seen on YouTube addressed this by 3D printing a spacer that fills the gap between the flat LCD and the curved bezel. Functionally it works, but examined up close it always looks a little off. The bezel has a strong curvature, and the spacer reads as a frame within a frame.
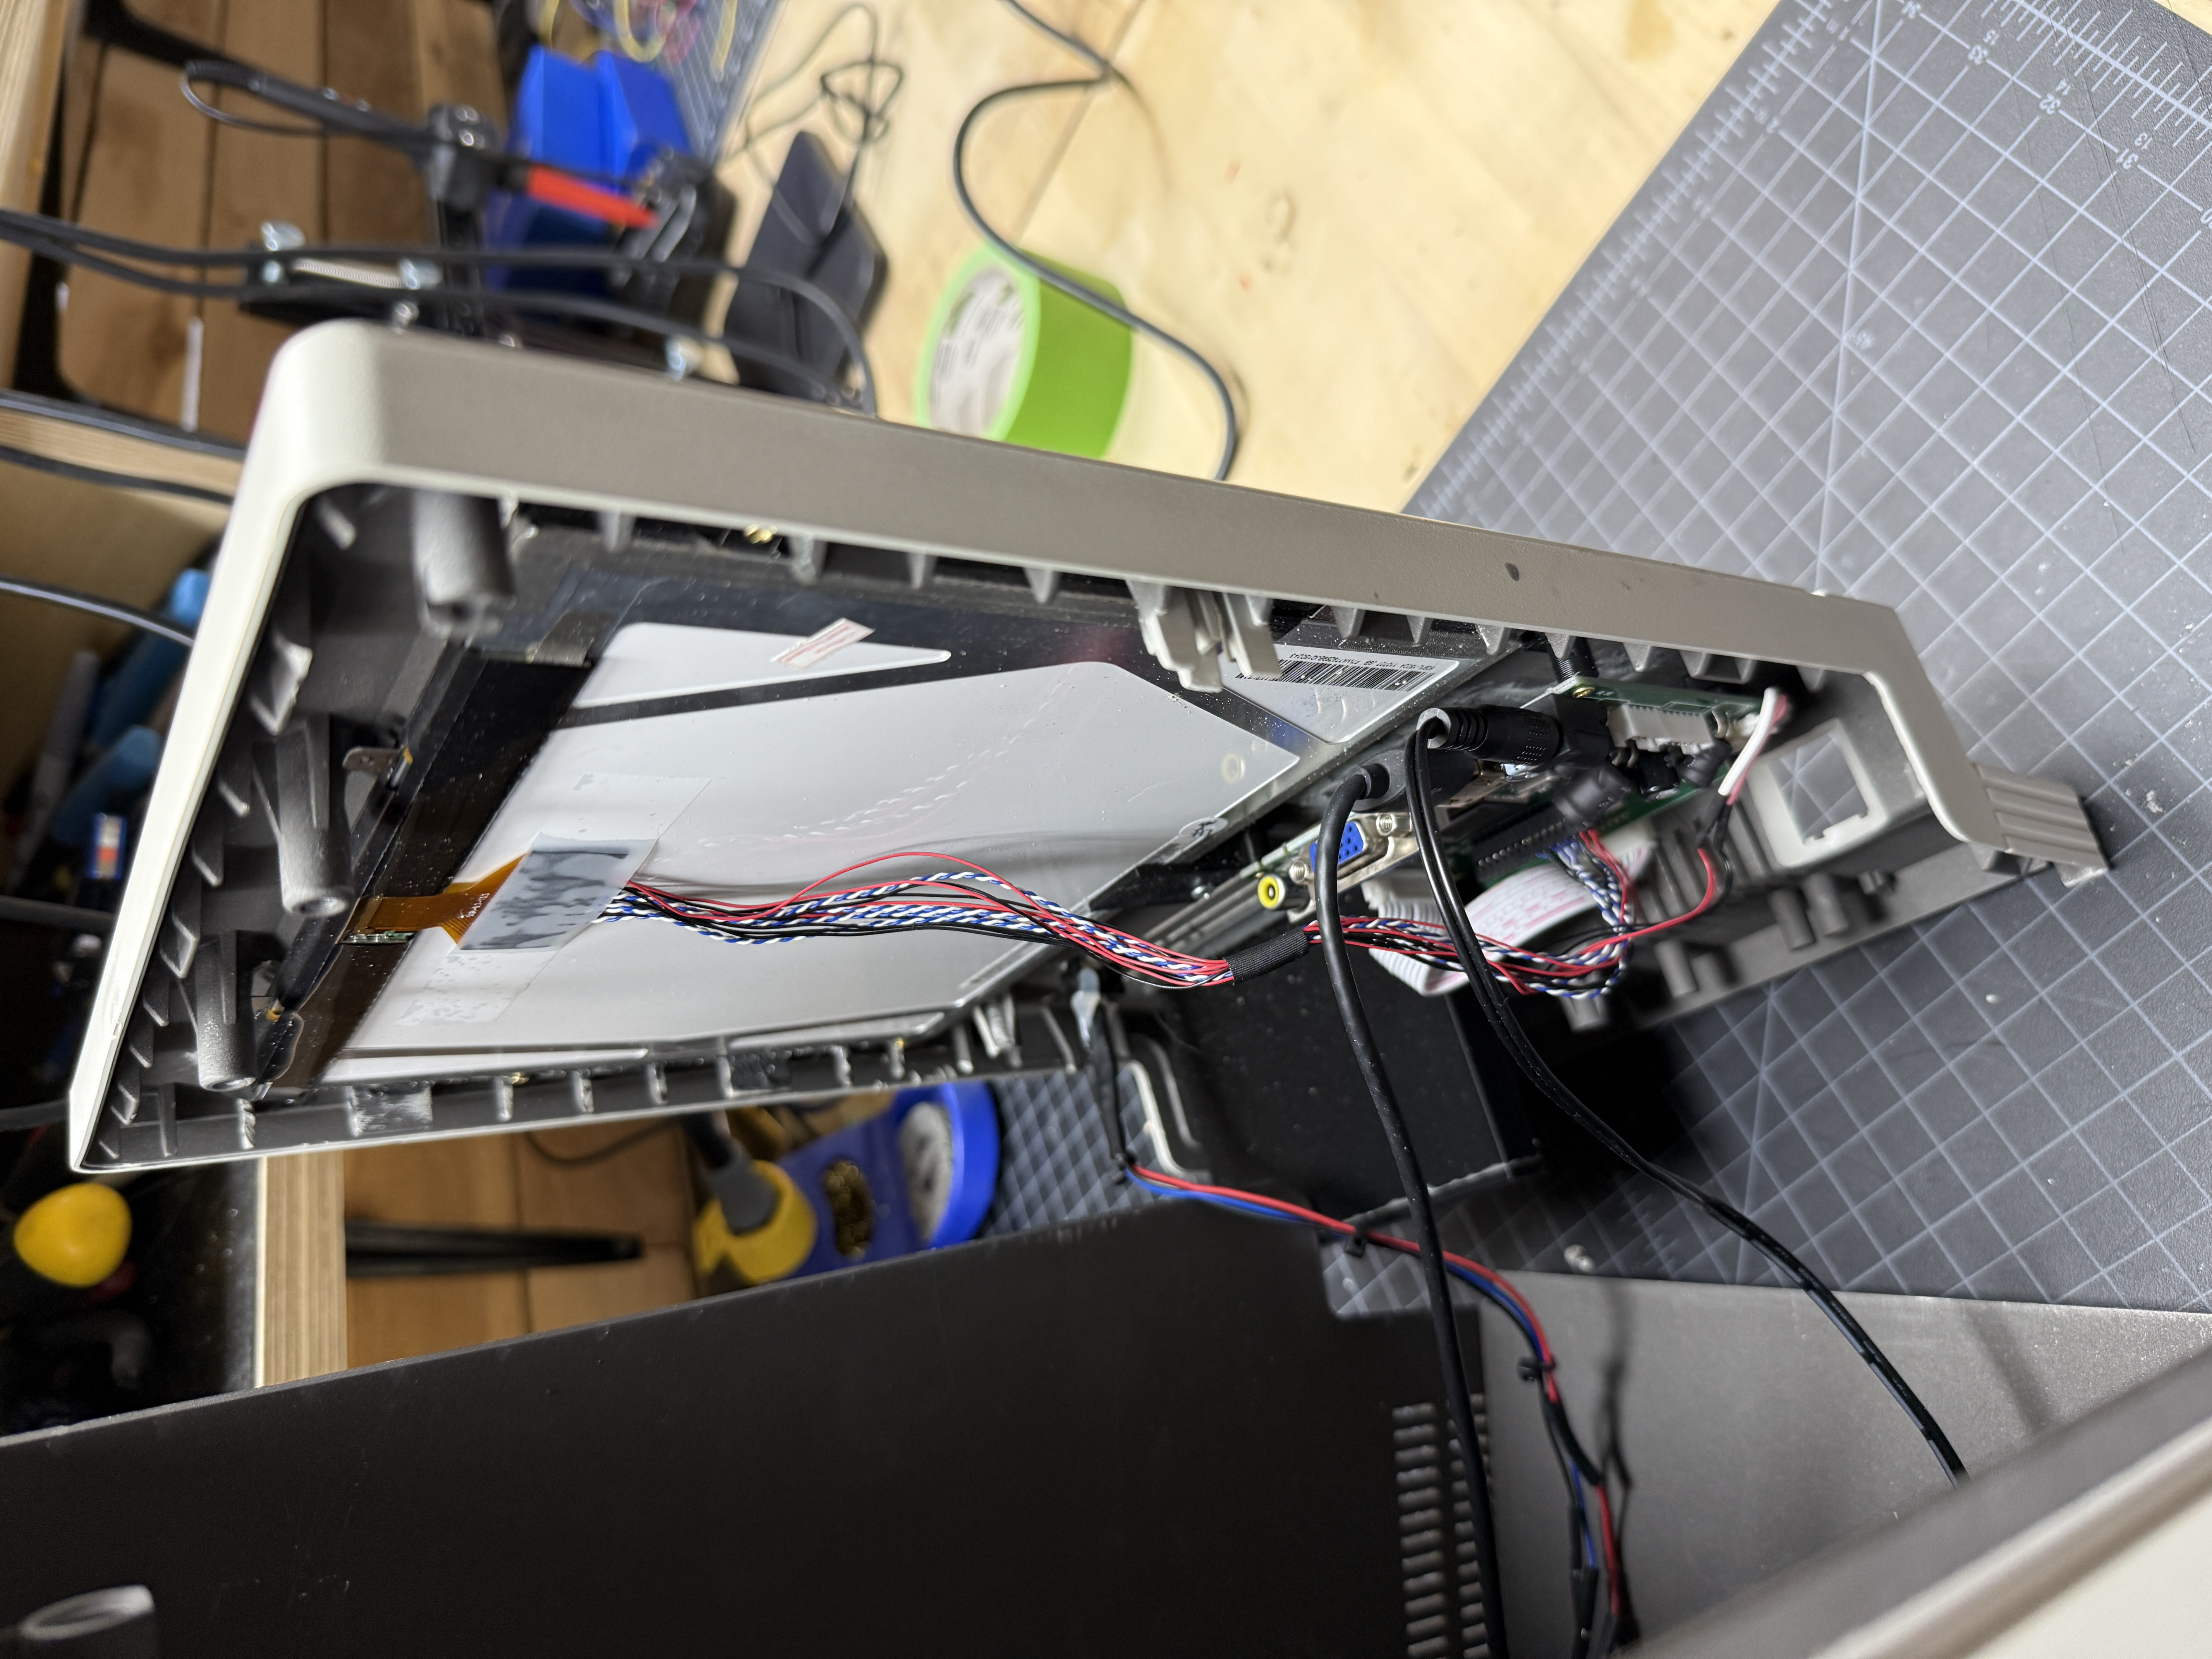
The LCD I chose was close to a 10-inch diagonal, slightly larger than the SE/30’s original screen opening. That gave me an idea: rather than add material between the LCD and the curved bezel, I would remove material from the back of the bezel. Two things happen when you do that. The back of the bezel flattens out, which gives the panel and my 3D-printed mounting brackets a proper surface to sit against. And the screen opening grows slightly, which lets me use nearly 100% of the LCD’s screen real estate.
This was a careful job with sandpaper, files, and a lot of patience. The geometry of the bezel curves in two axes, so as I filed the back flat I had to pay close attention to keeping the opening square and symmetrical. One slip and the whole bezel is ruined. In the end it came out cleaner than I expected, and from the front the LCD looks like it was always meant to be there.
Software: Mini vMac and the Emulator Landscape

There are a handful of classic Mac emulators that run on the Raspberry Pi. Each one targets a different era of the classic Mac timeline and choosing between them is mostly a question of what era of software you want to run:
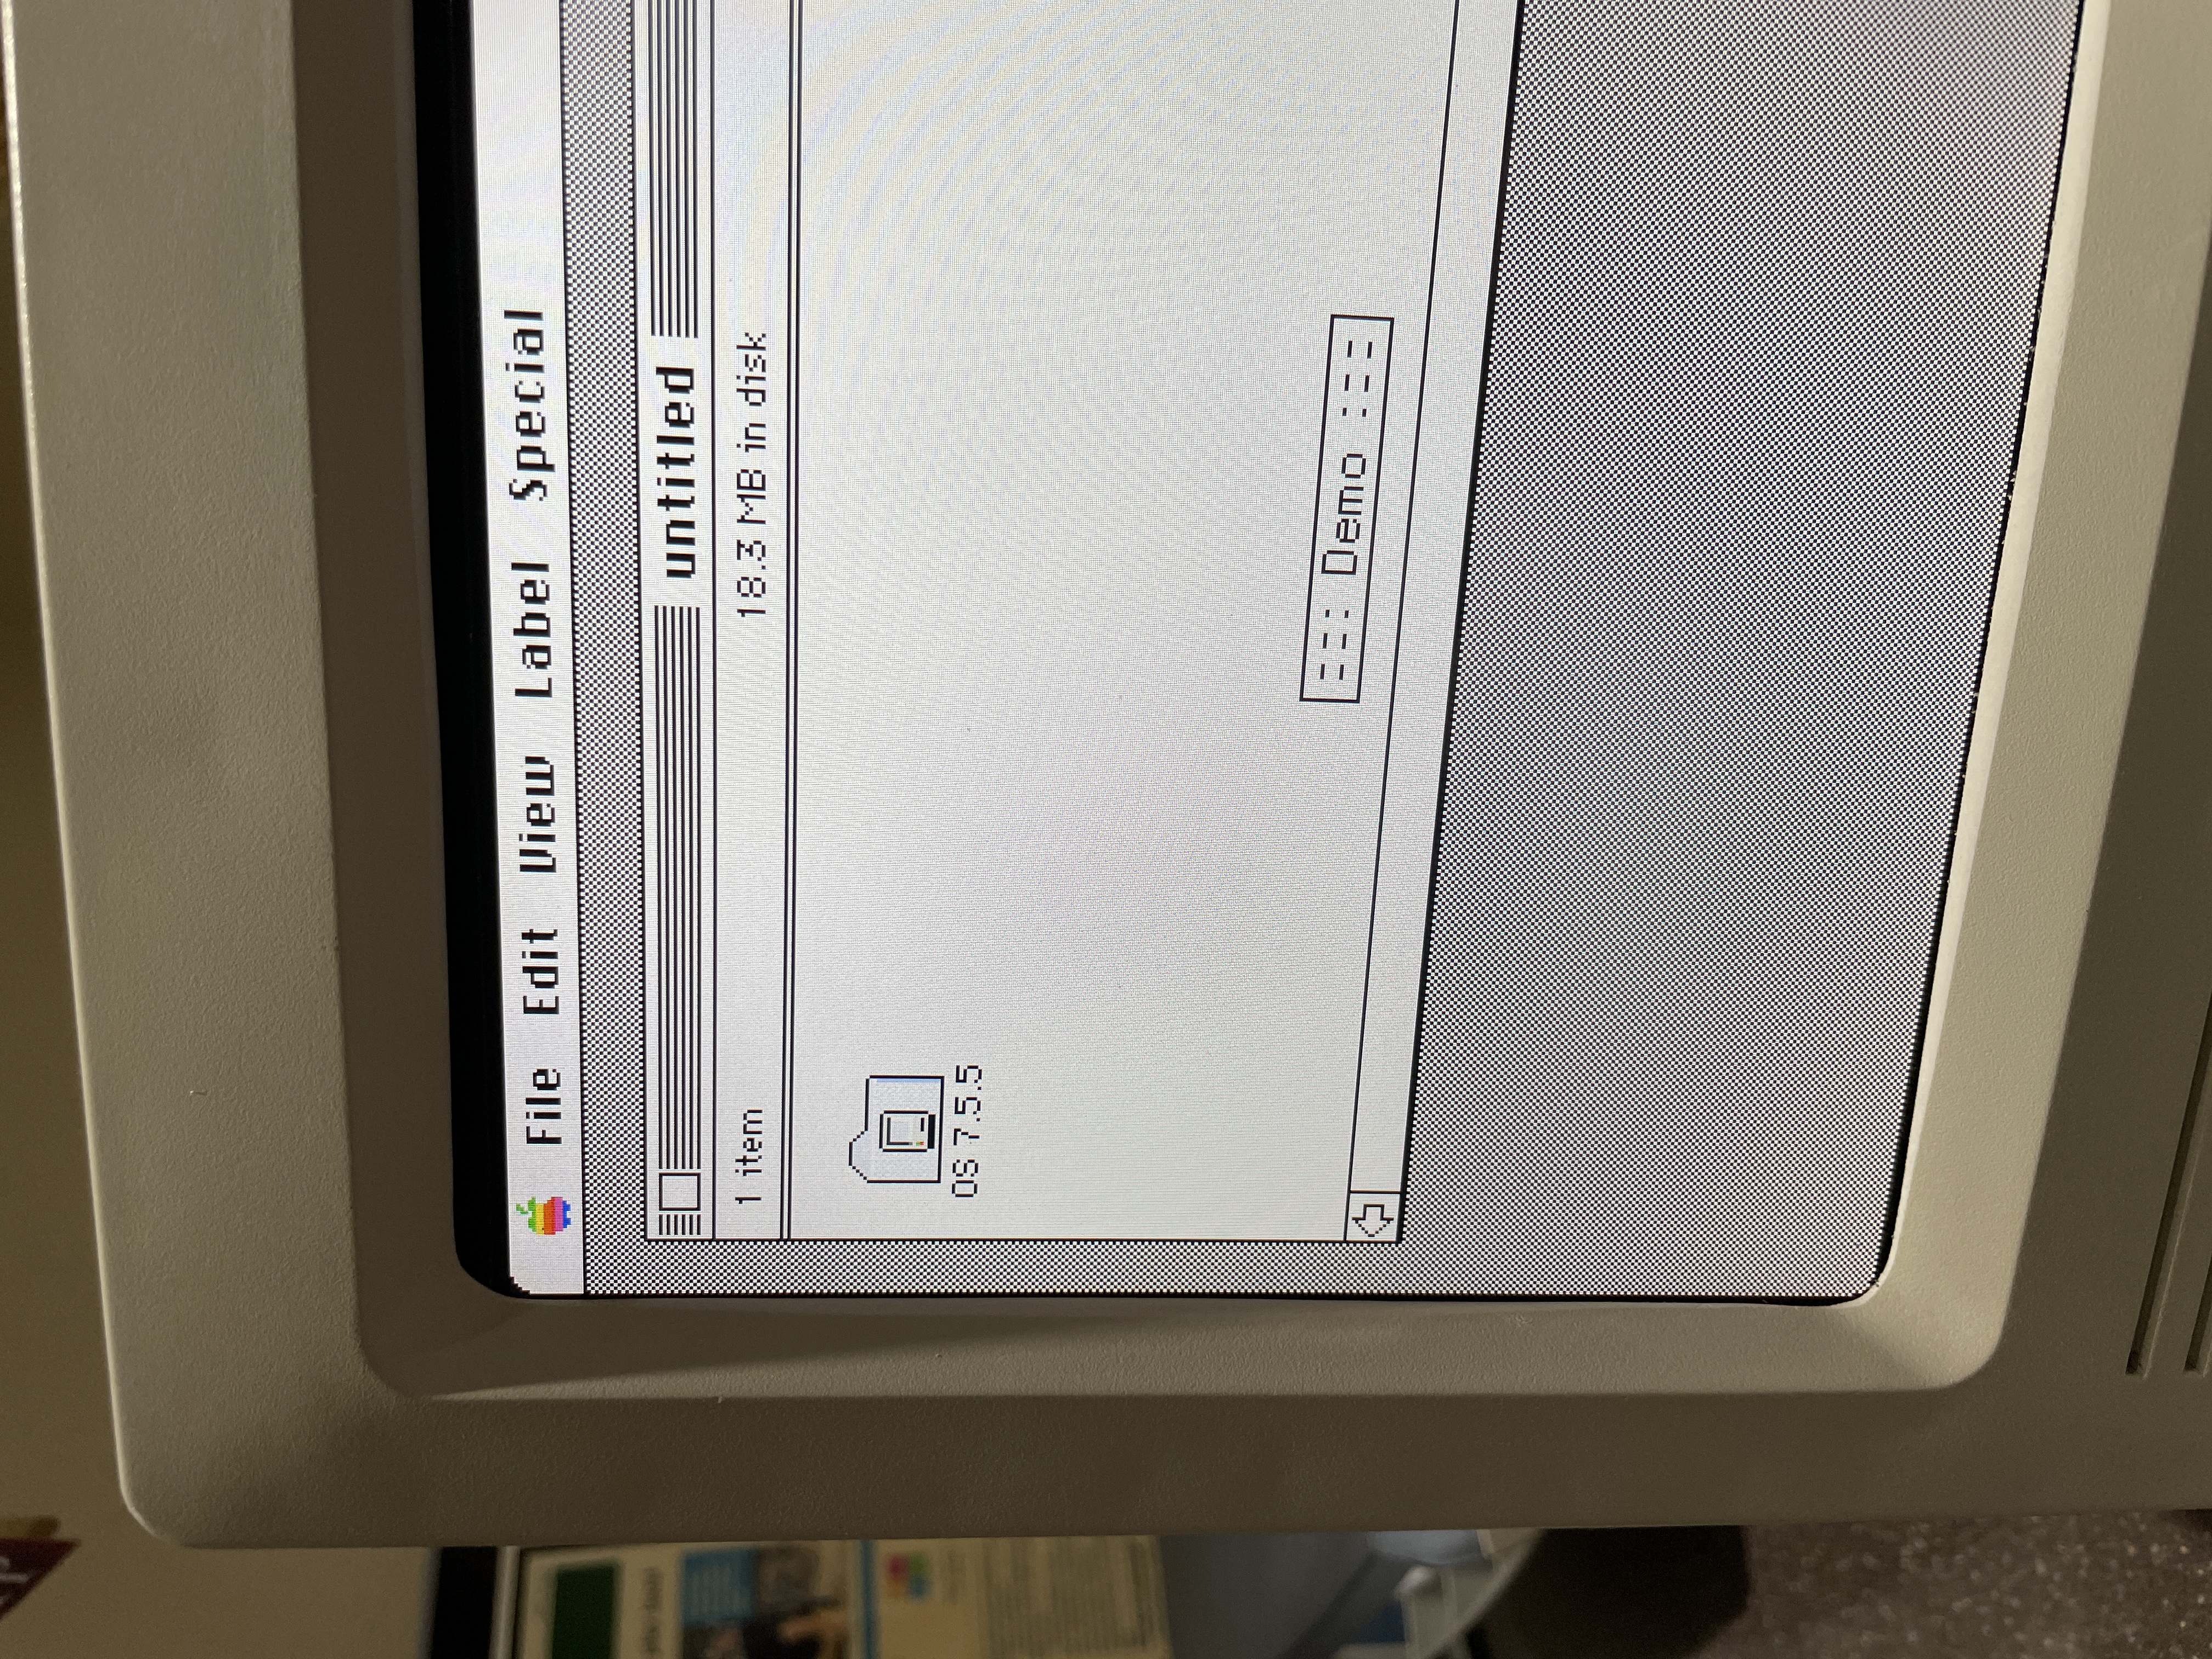
- Mini vMac emulates the Macintosh 128K, 512K, Plus, SE, Classic, and (in newer variations) the Macintosh II. It covers System 1.1 through System 7.5.5, roughly the 1984–1996 era. It is simple, fast, and accurate, and it is widely considered the most user-friendly of the classic Mac emulators.
- Basilisk II emulates a 680x0 Macintosh running System 7 through Mac OS 8.1, covering roughly 1991–1998. It is the right choice for mid-90s software.
- SheepShaver emulates a PowerPC Macintosh running Mac OS 7.5.2 through 9.0.4, covering 1995–2000. It is the only practical way to run late-90s PowerPC-only software in its original environment.
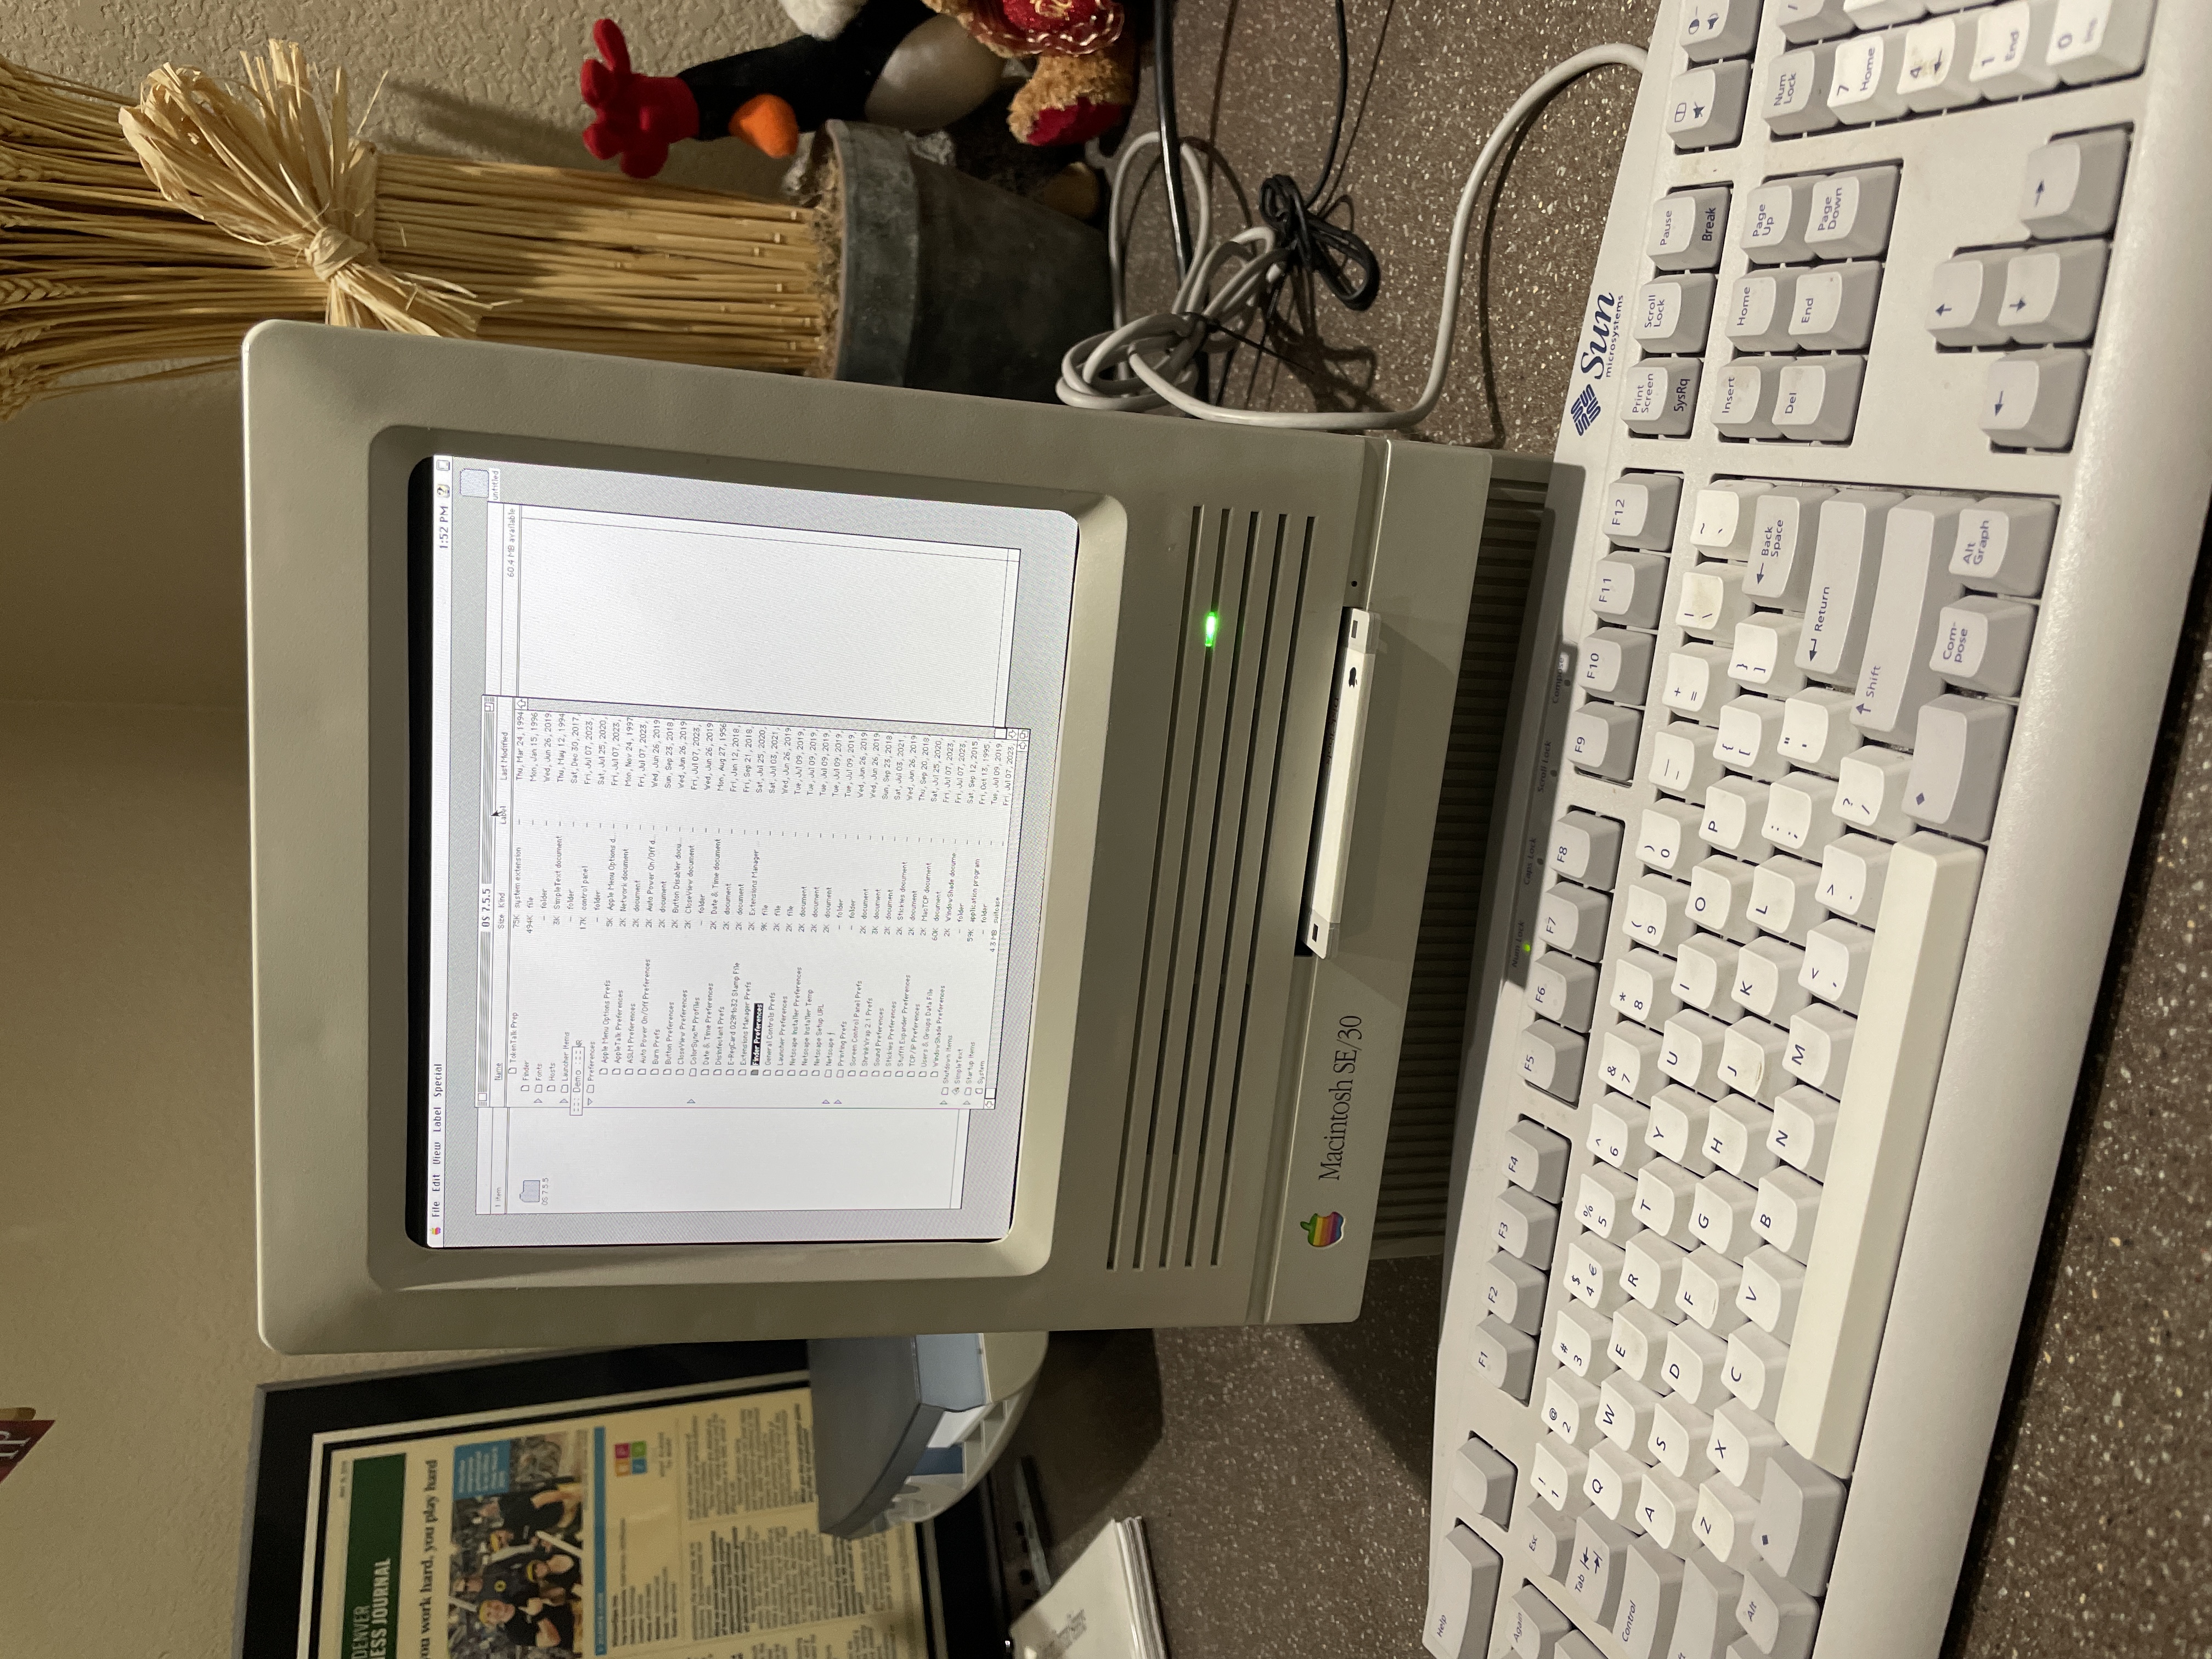
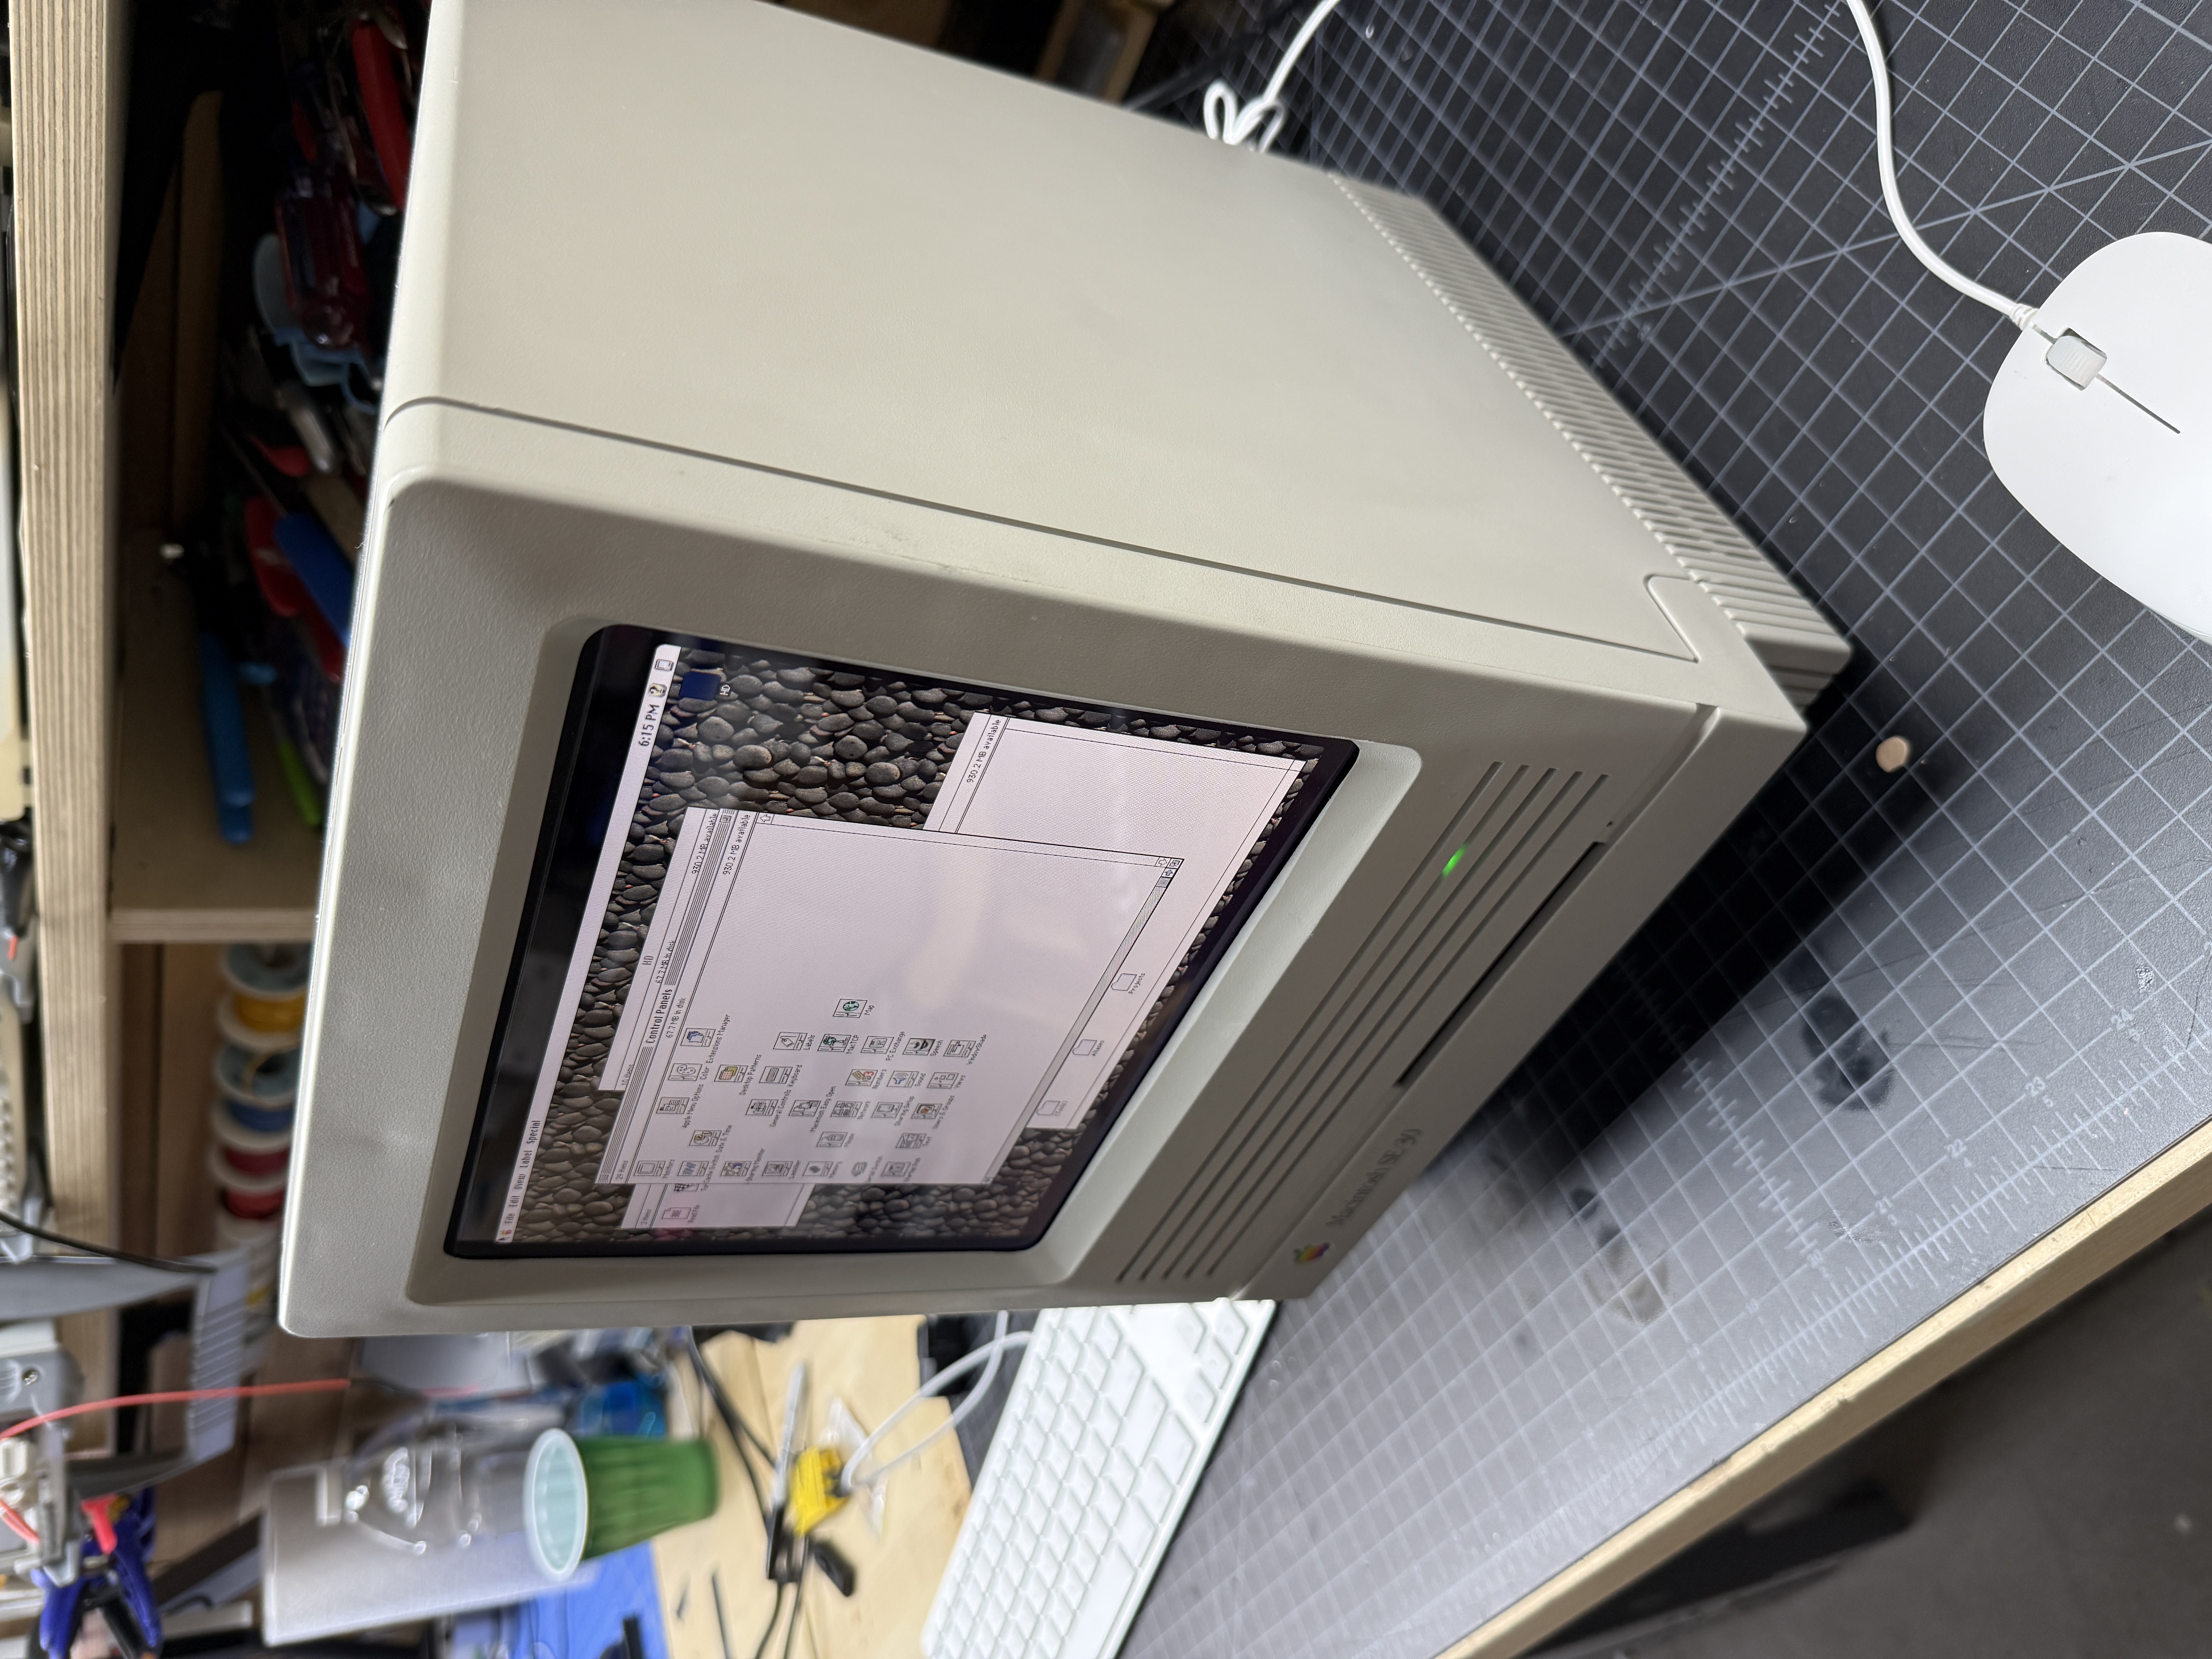
Mini vMac was the easiest to get running on the Pi and it handled everything I wanted to do. I was aiming for an SE/30 experience, but the SE/30 ROM is not among the mainstream Mini vMac variations. What I did have was a Macintosh II ROM, and the Mac II variation of Mini vMac turned out to work just fine for my purposes. It gives me color, it gives me a resolution I can actually read, and it runs most of the classic Mac software I care about.
You have a few choices for screen resolution. I ended up running at a higher resolution than the SE/30’s native 512x384 with a border around the emulated desktop so that the pixels line up nicely with the LCD’s native resolution. The result is a much sharper, larger desktop than the SE/30 ever had. It is very readable and, frankly, more usable than the original machine for everyday classic Mac software.
The Case
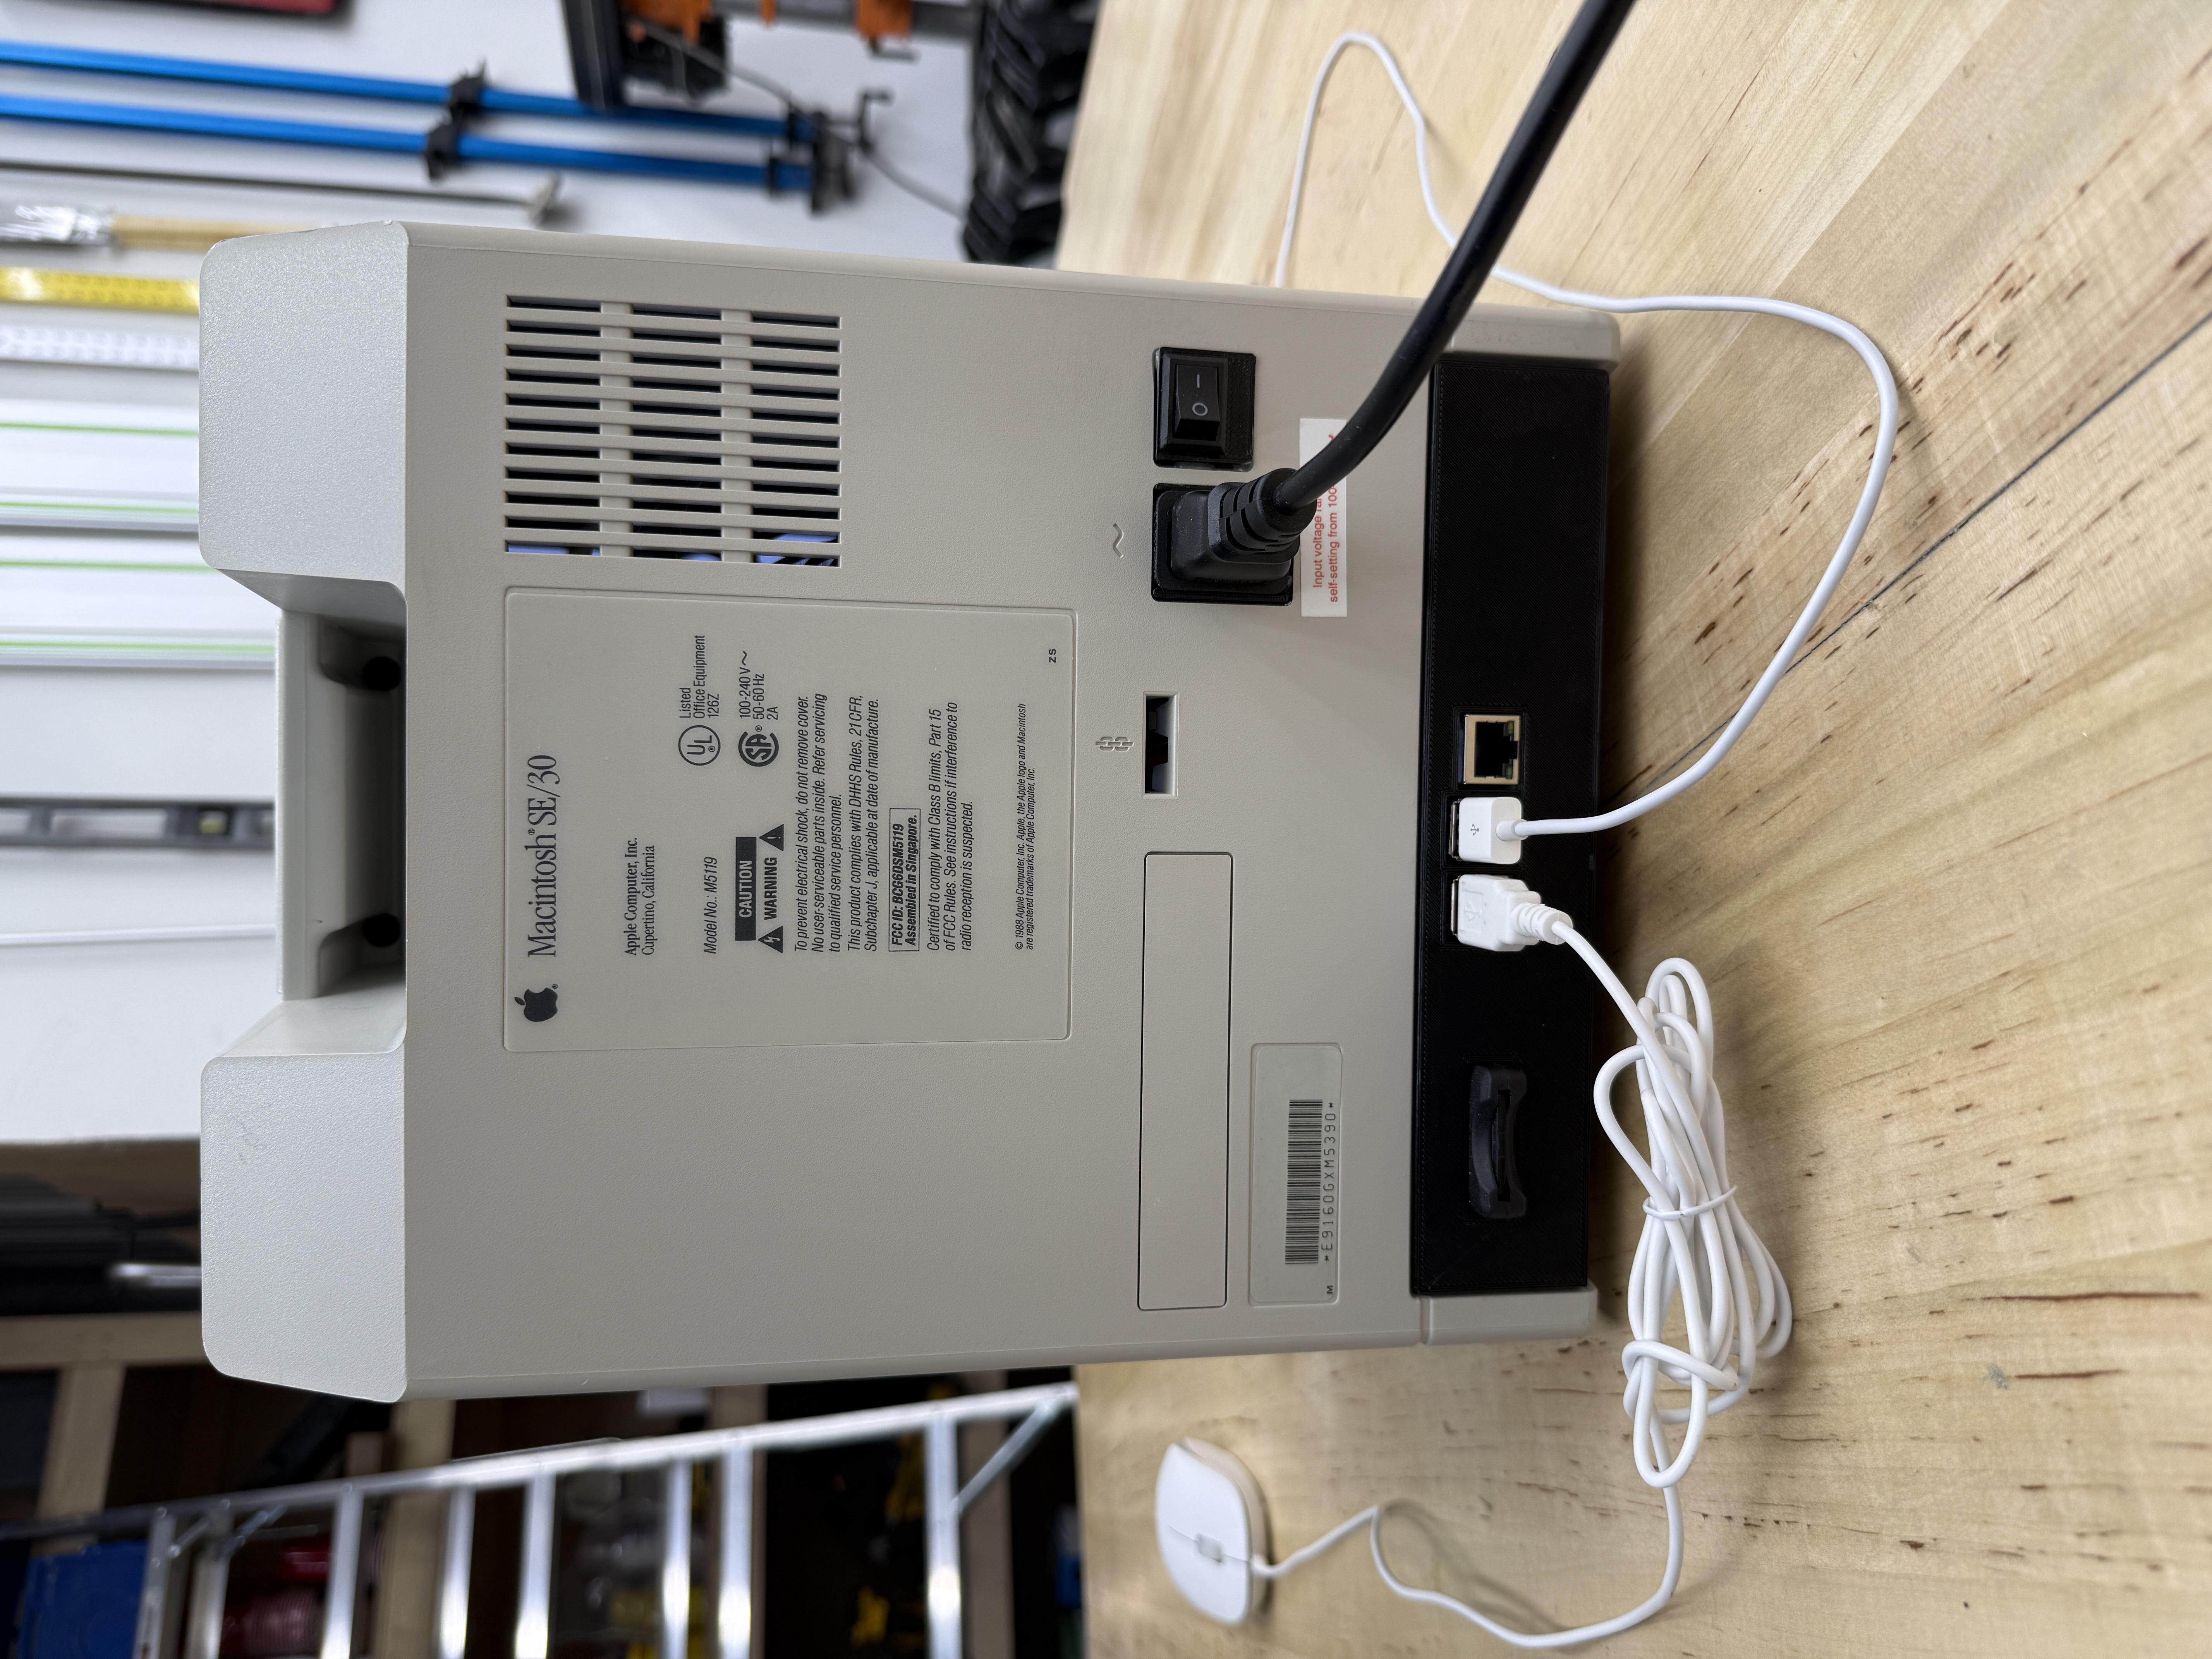
I wanted the case to be clean on the outside. No power brick dangling off the back, no exposed USB dongles, no obvious modern connectors. The power cable should plug straight into the back of the Mac the way it always did.
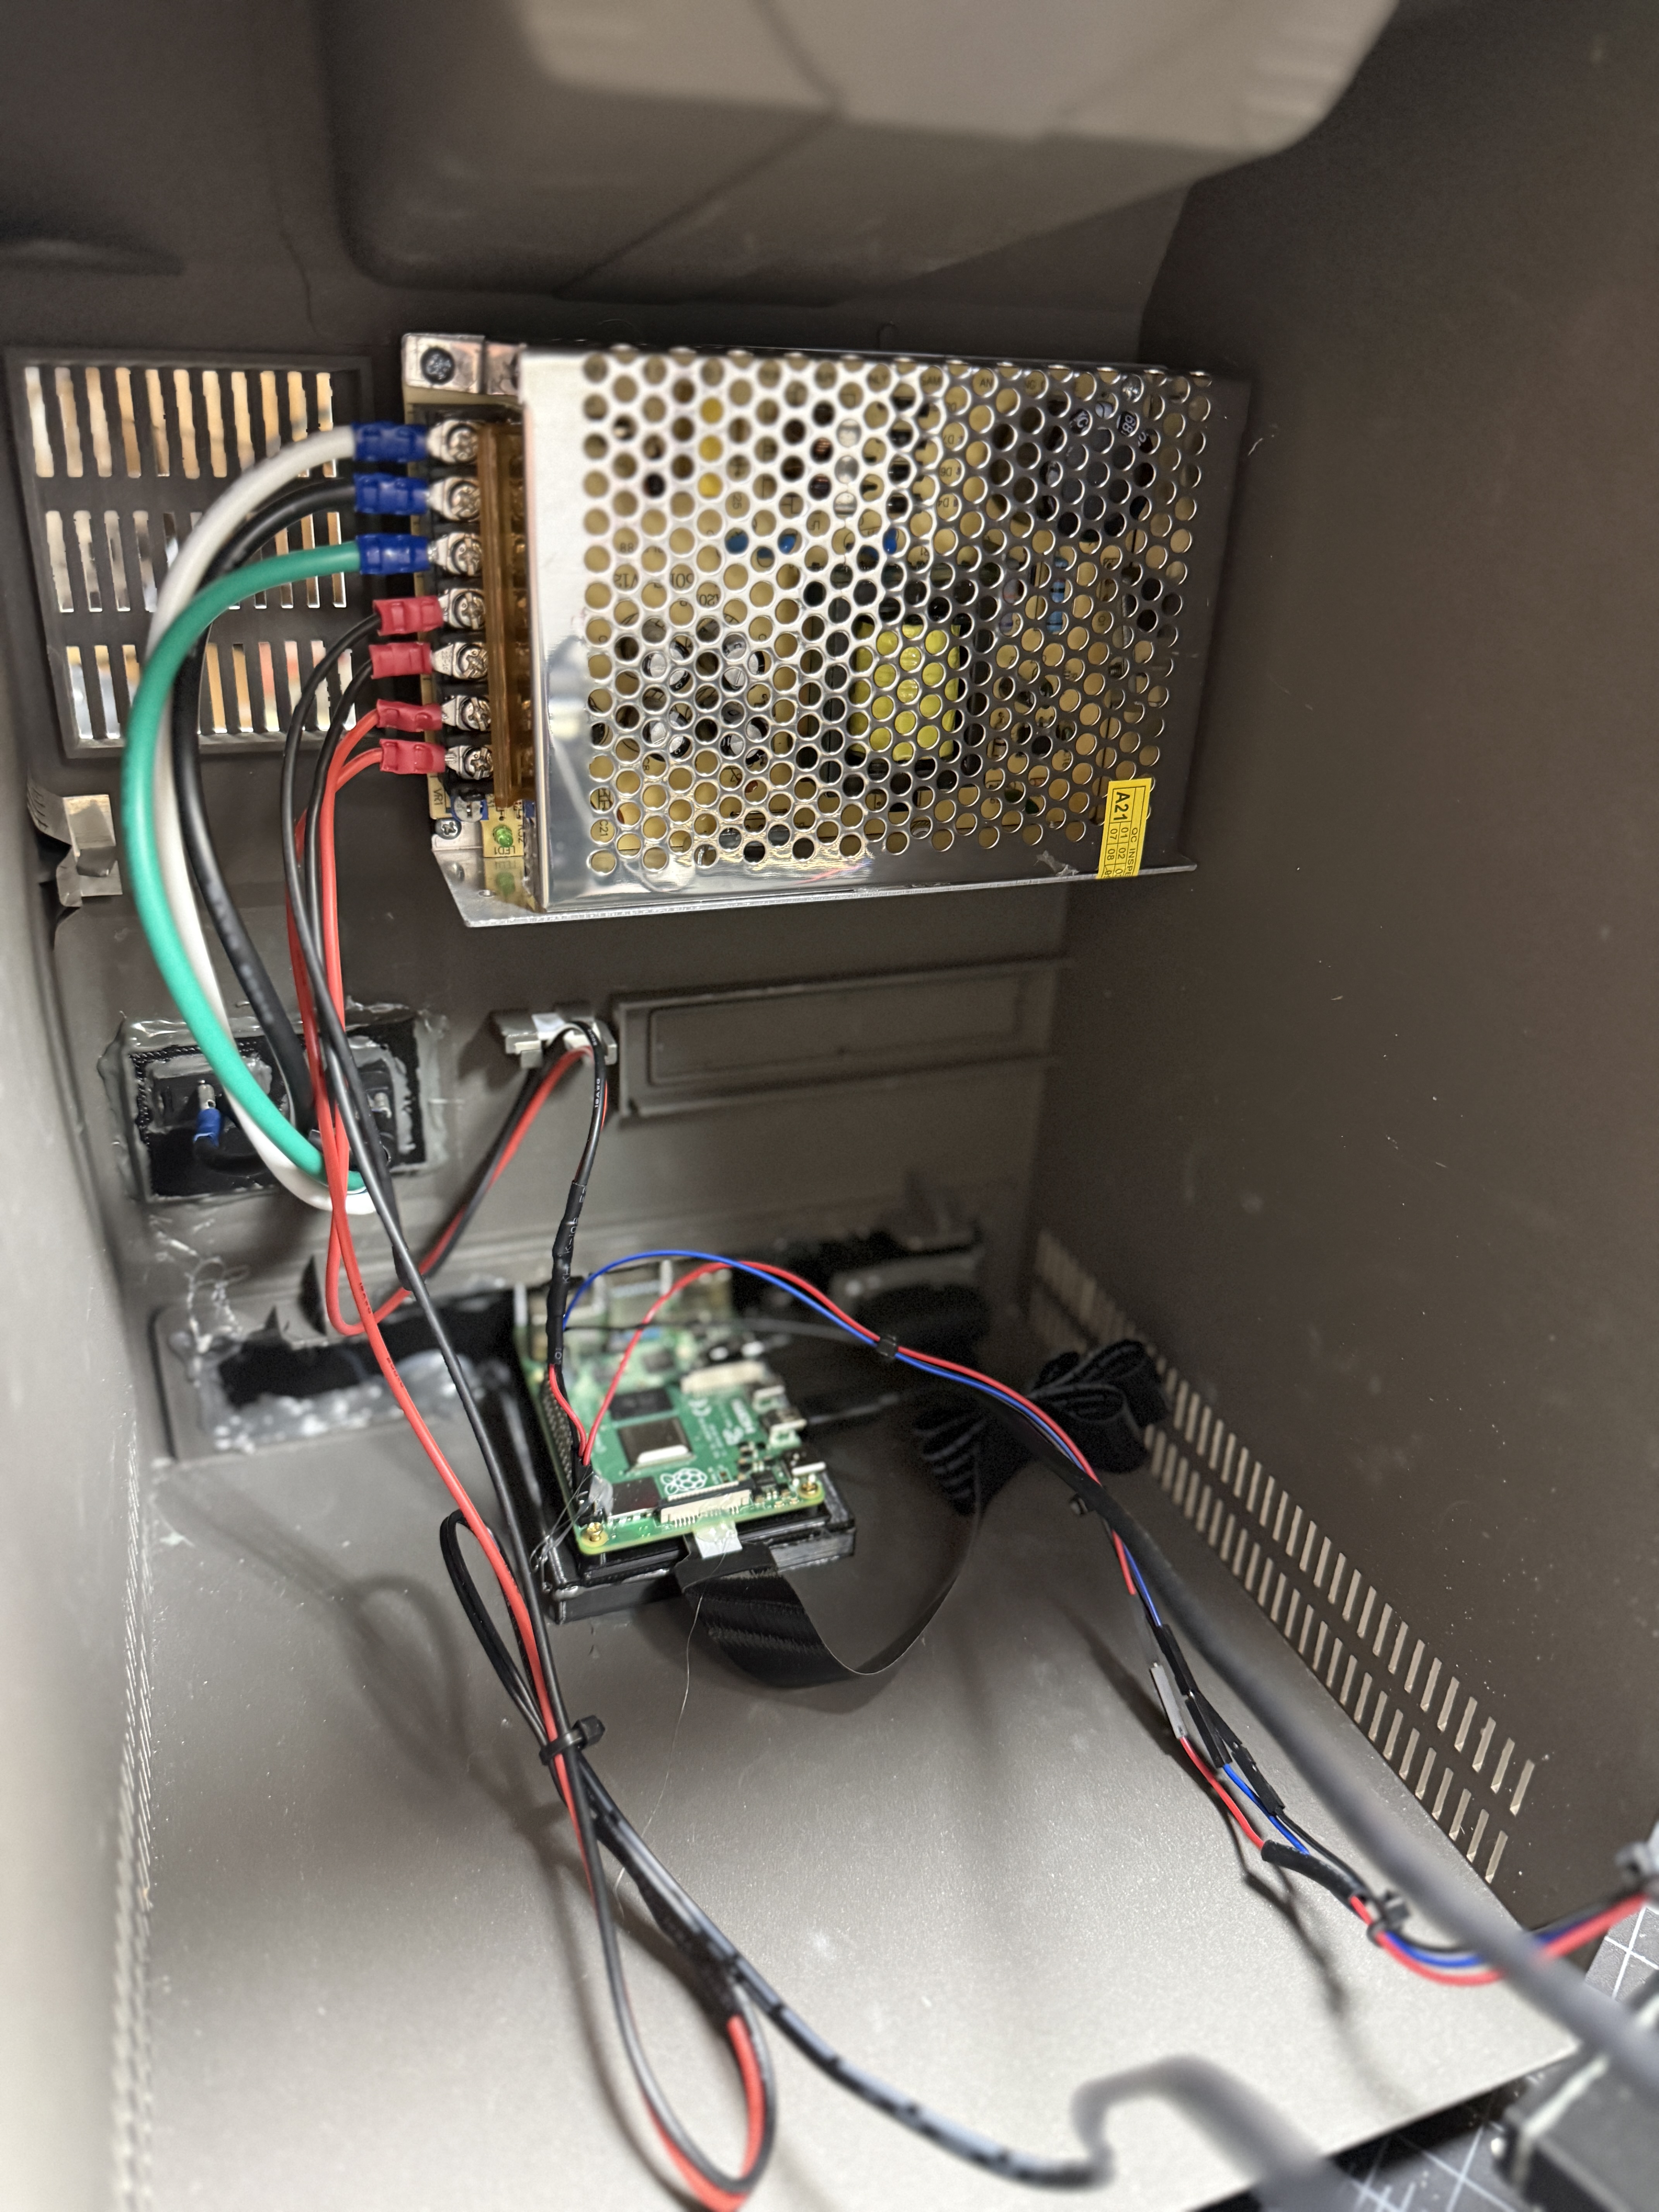
With the original logic board, analog board, and CRT removed, the SE/30 case has a surprising amount of room inside. I bought a small enclosed 12V/5V switching supply from Amazon and found a spot to mount it against one of the internal ribs. Mains power is fed from the original C14 inlet harvested from a dead Apple PSU, so the external appearance is unchanged. I installed a rocker power switch in the original switch opening so the machine powers on and off exactly where it always did.
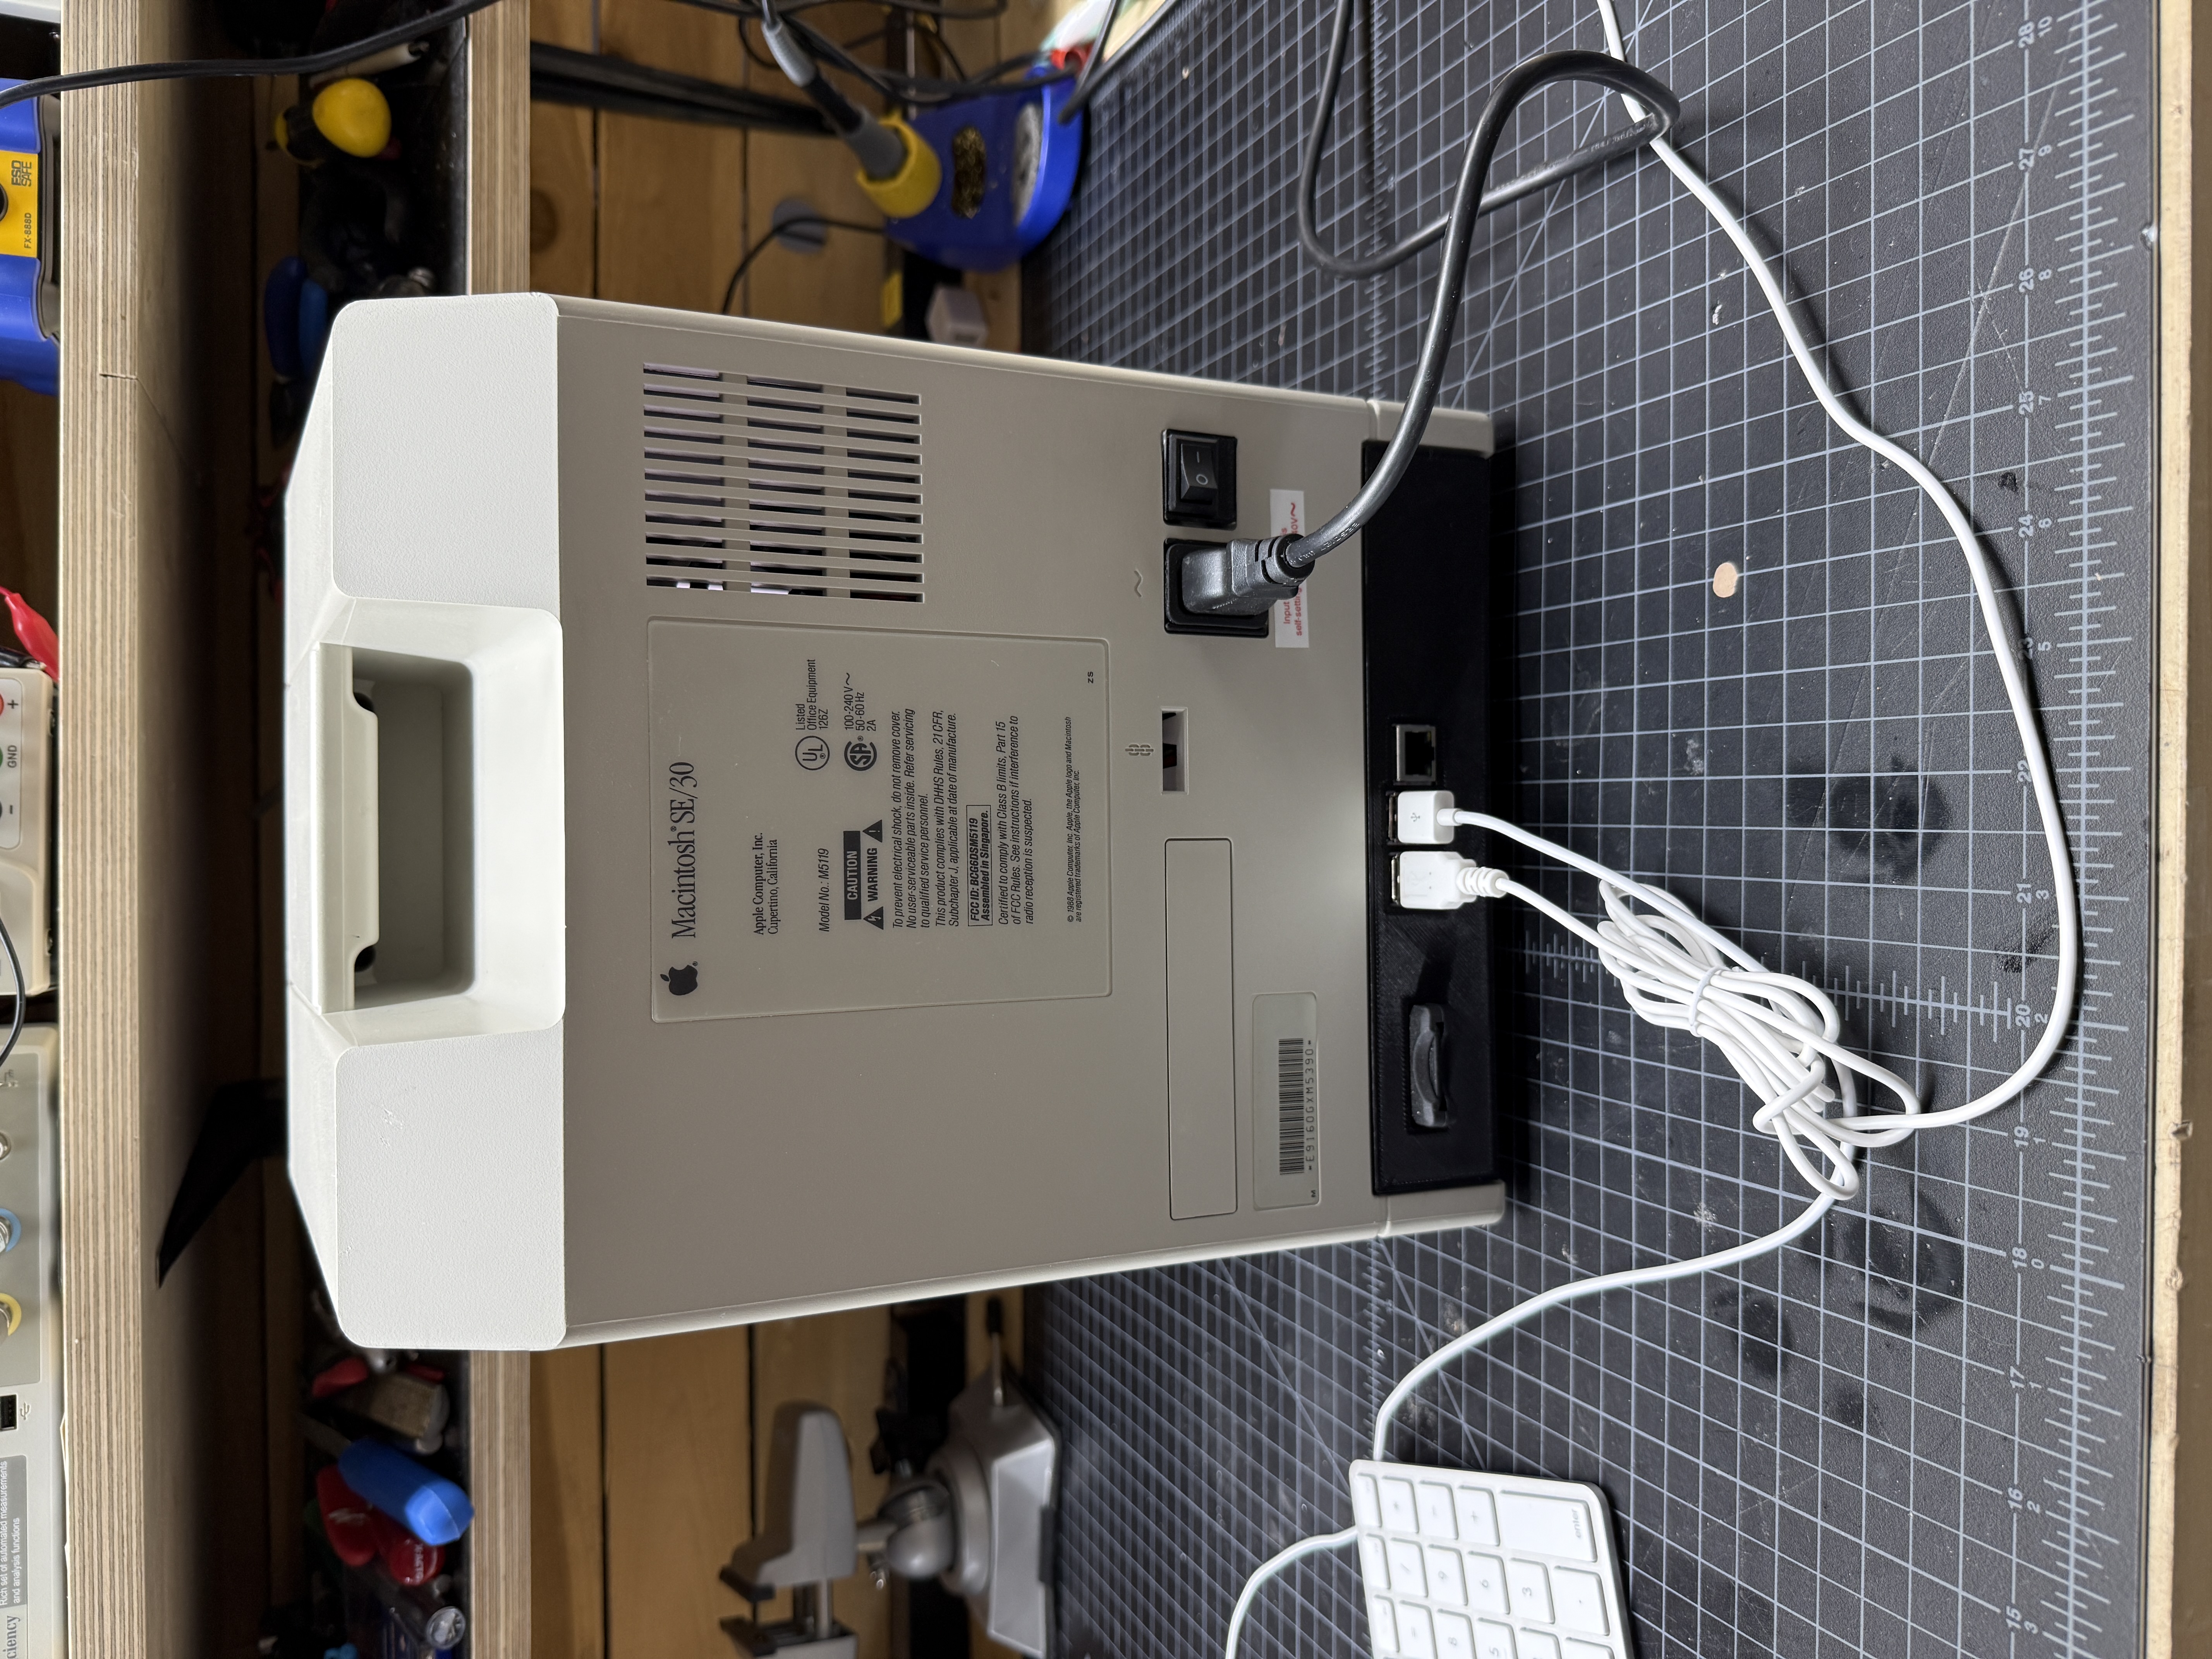
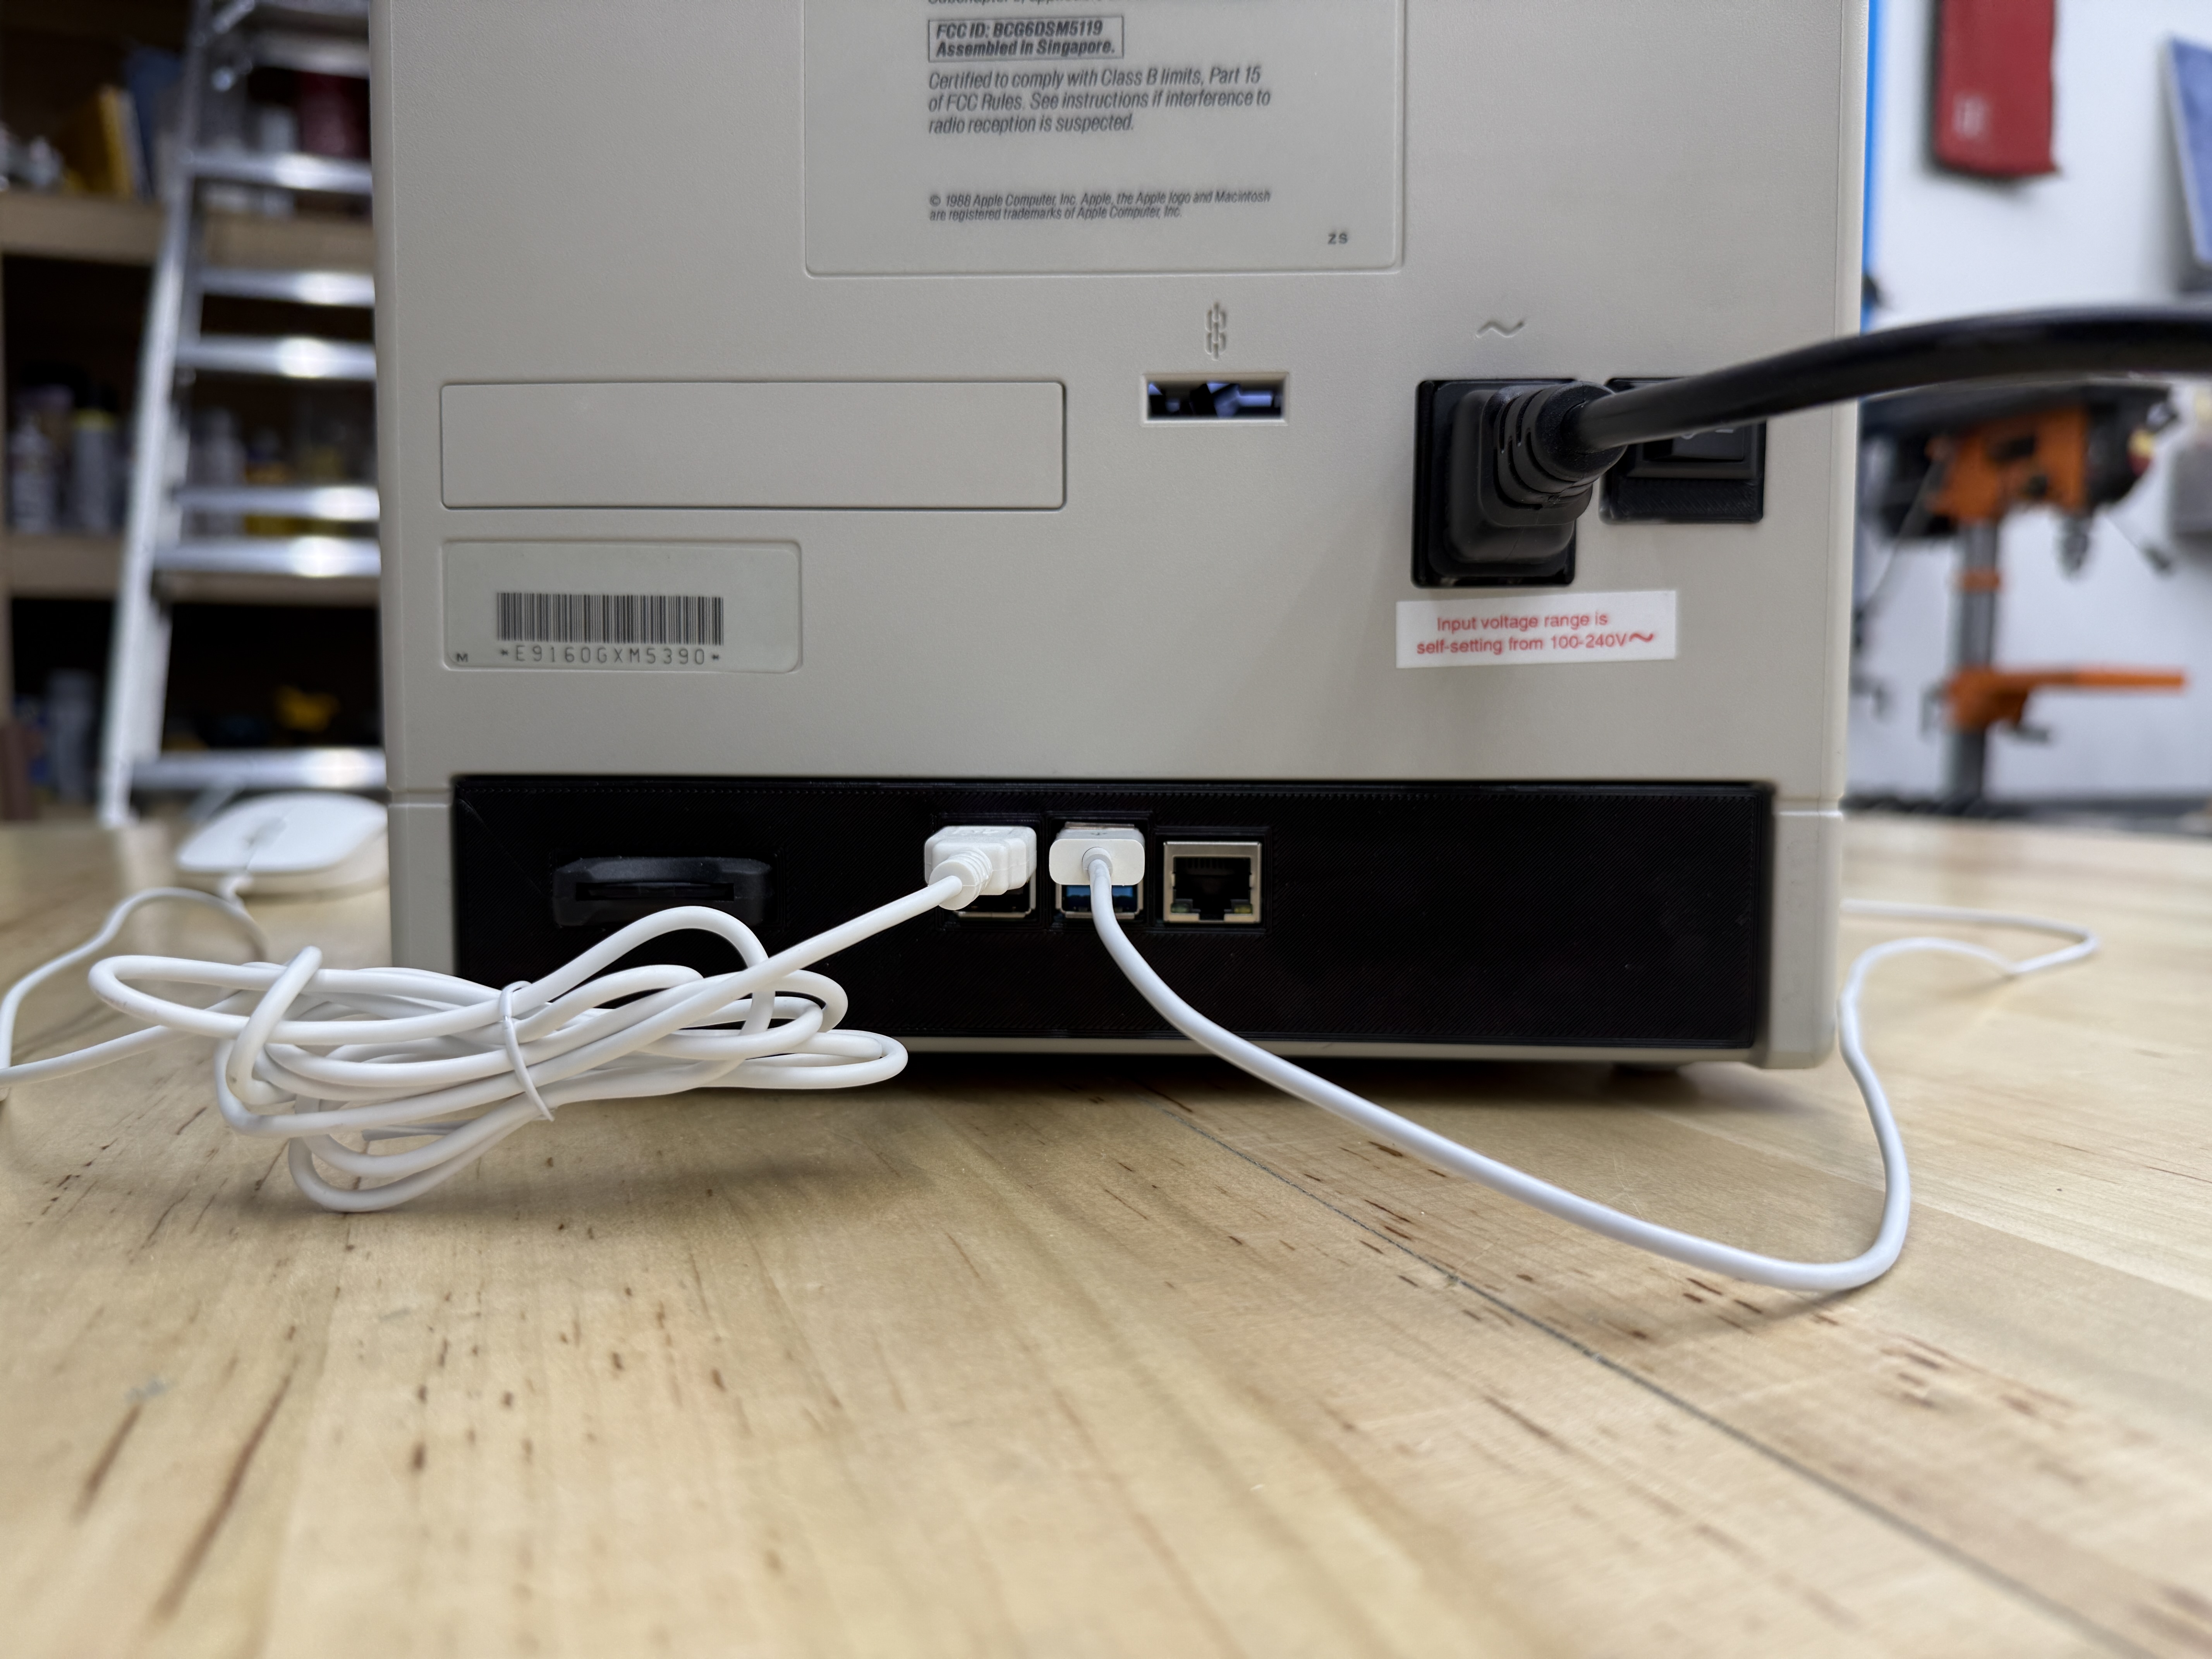
To keep the interior tidy I designed a 3D-printed tray for the Pi with an integrated back bezel. The Pi’s USB, HDMI, and Ethernet ports extend through cutouts in that bezel so the connectors line up cleanly with the rear of the case. When you look at the back of the finished machine it looks surprisingly close to a production product rather than a hobby build.
The Back: Ports and Power
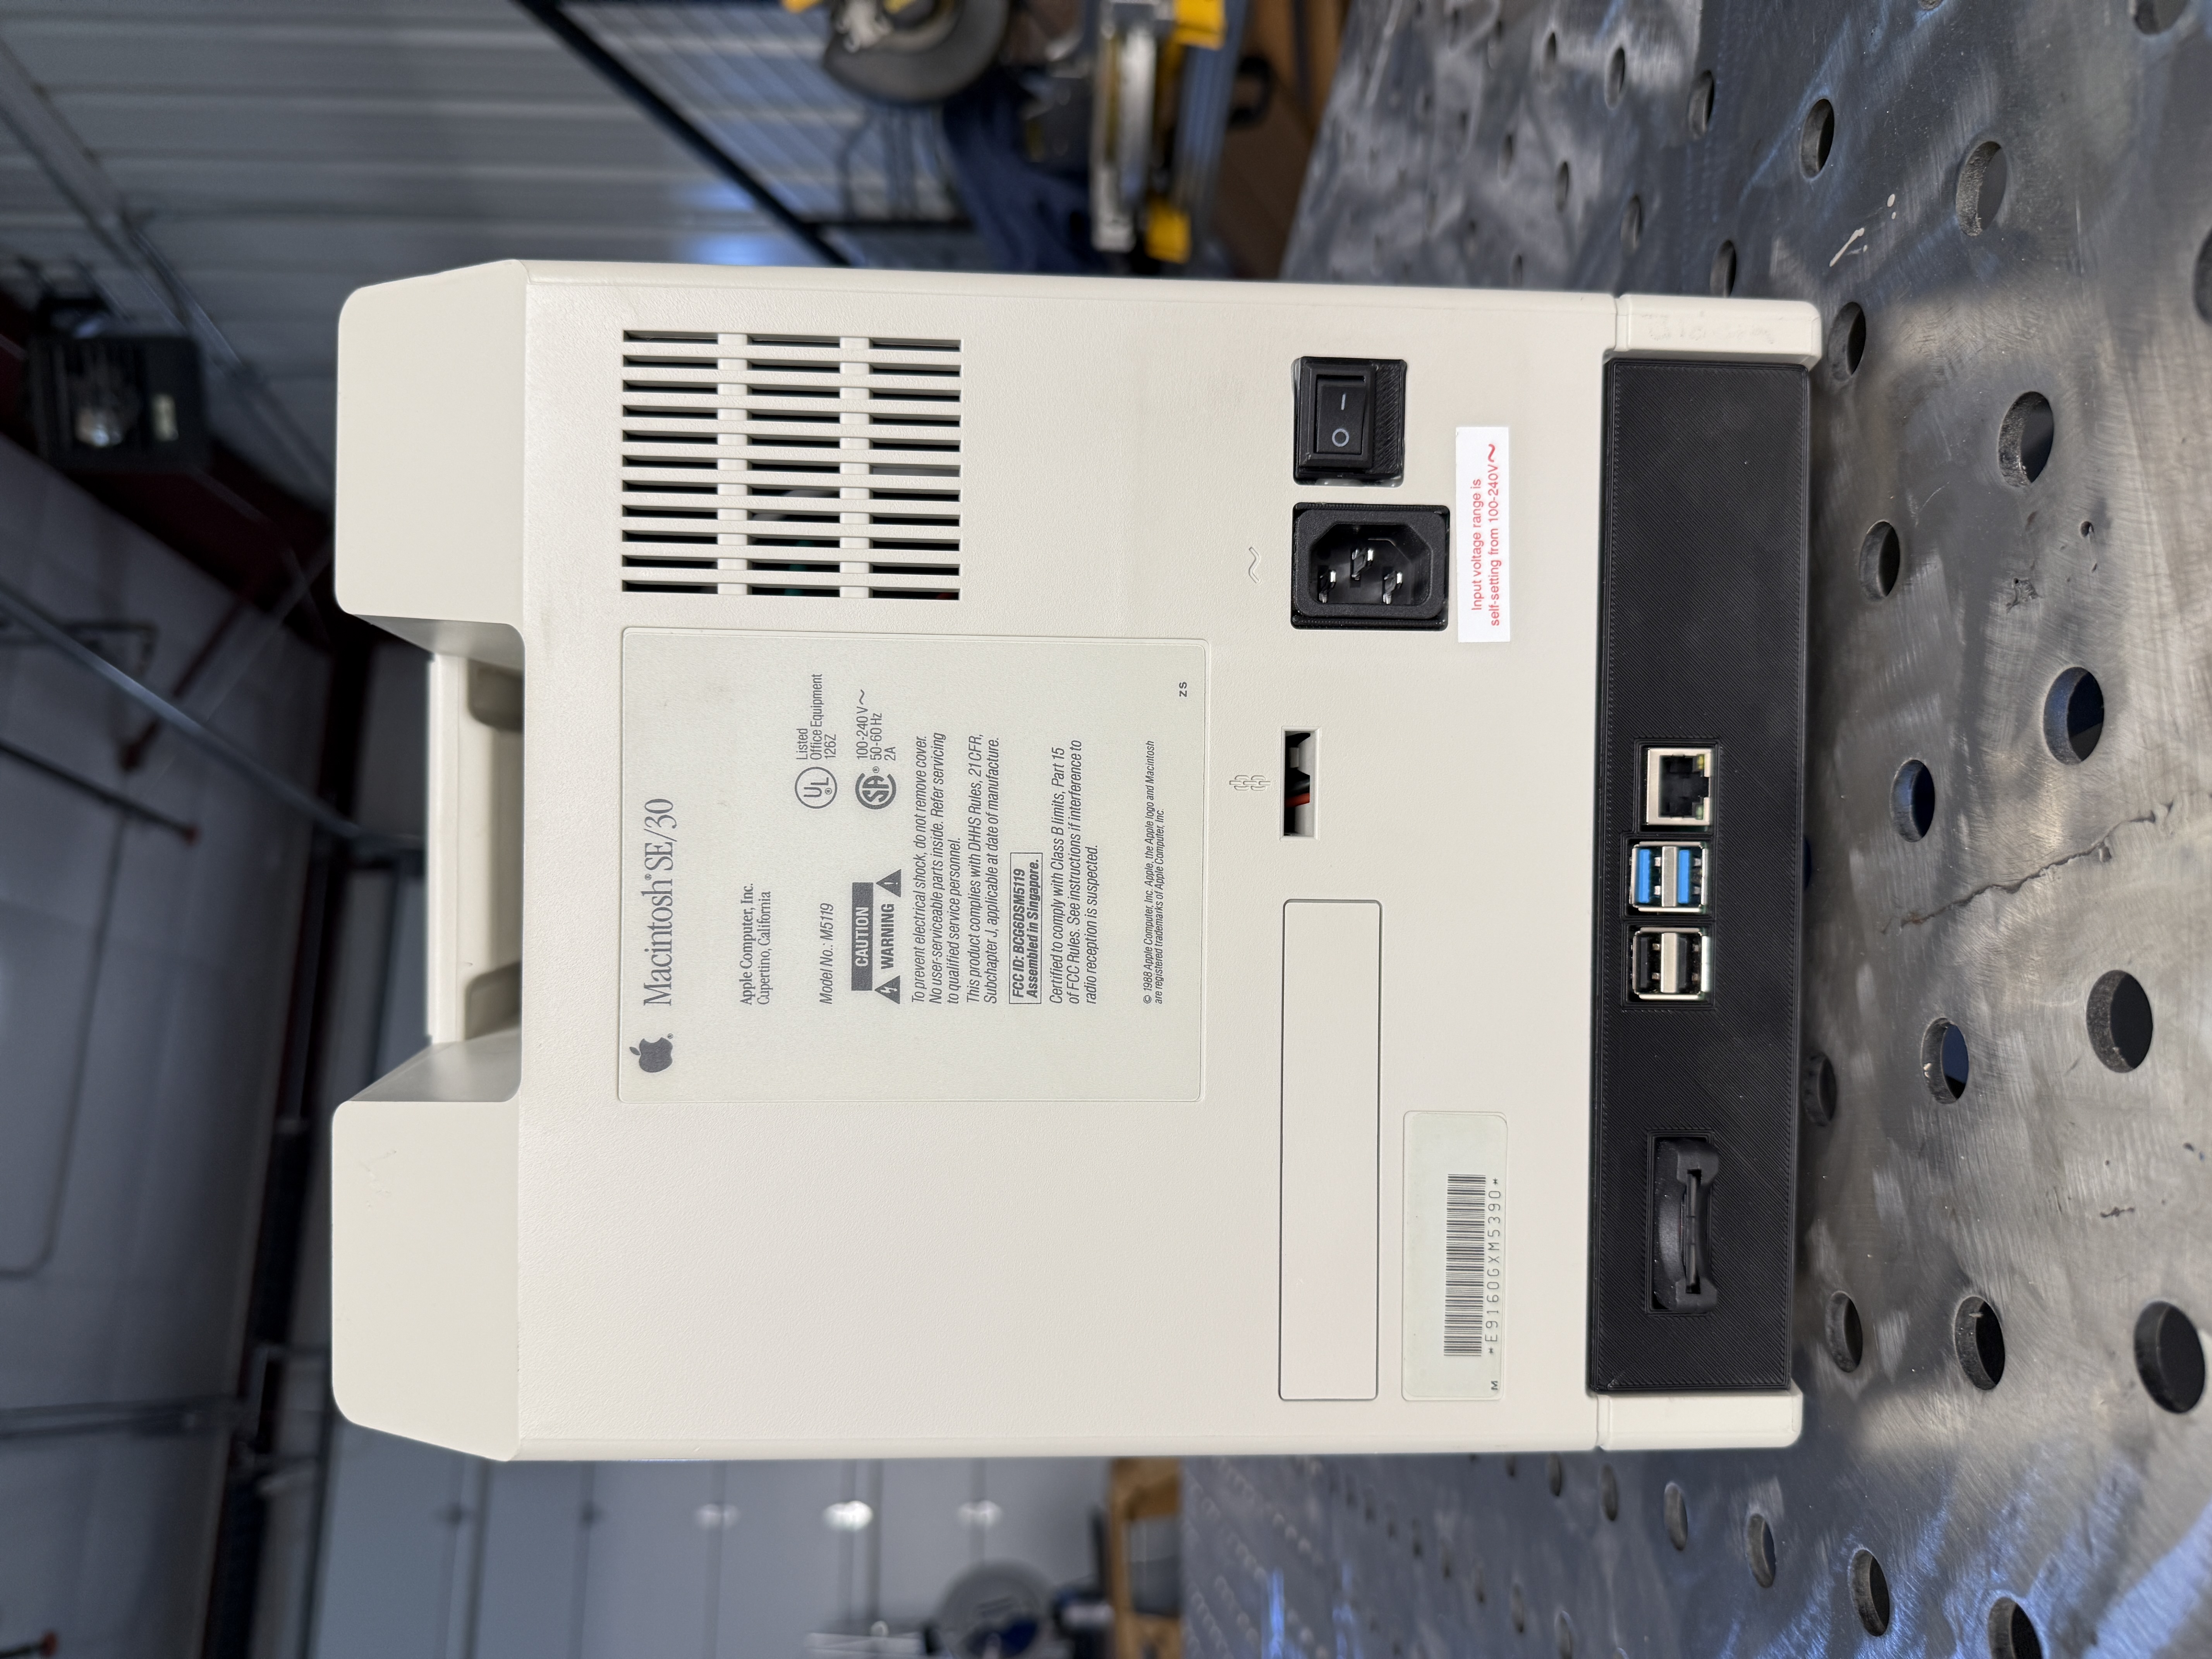
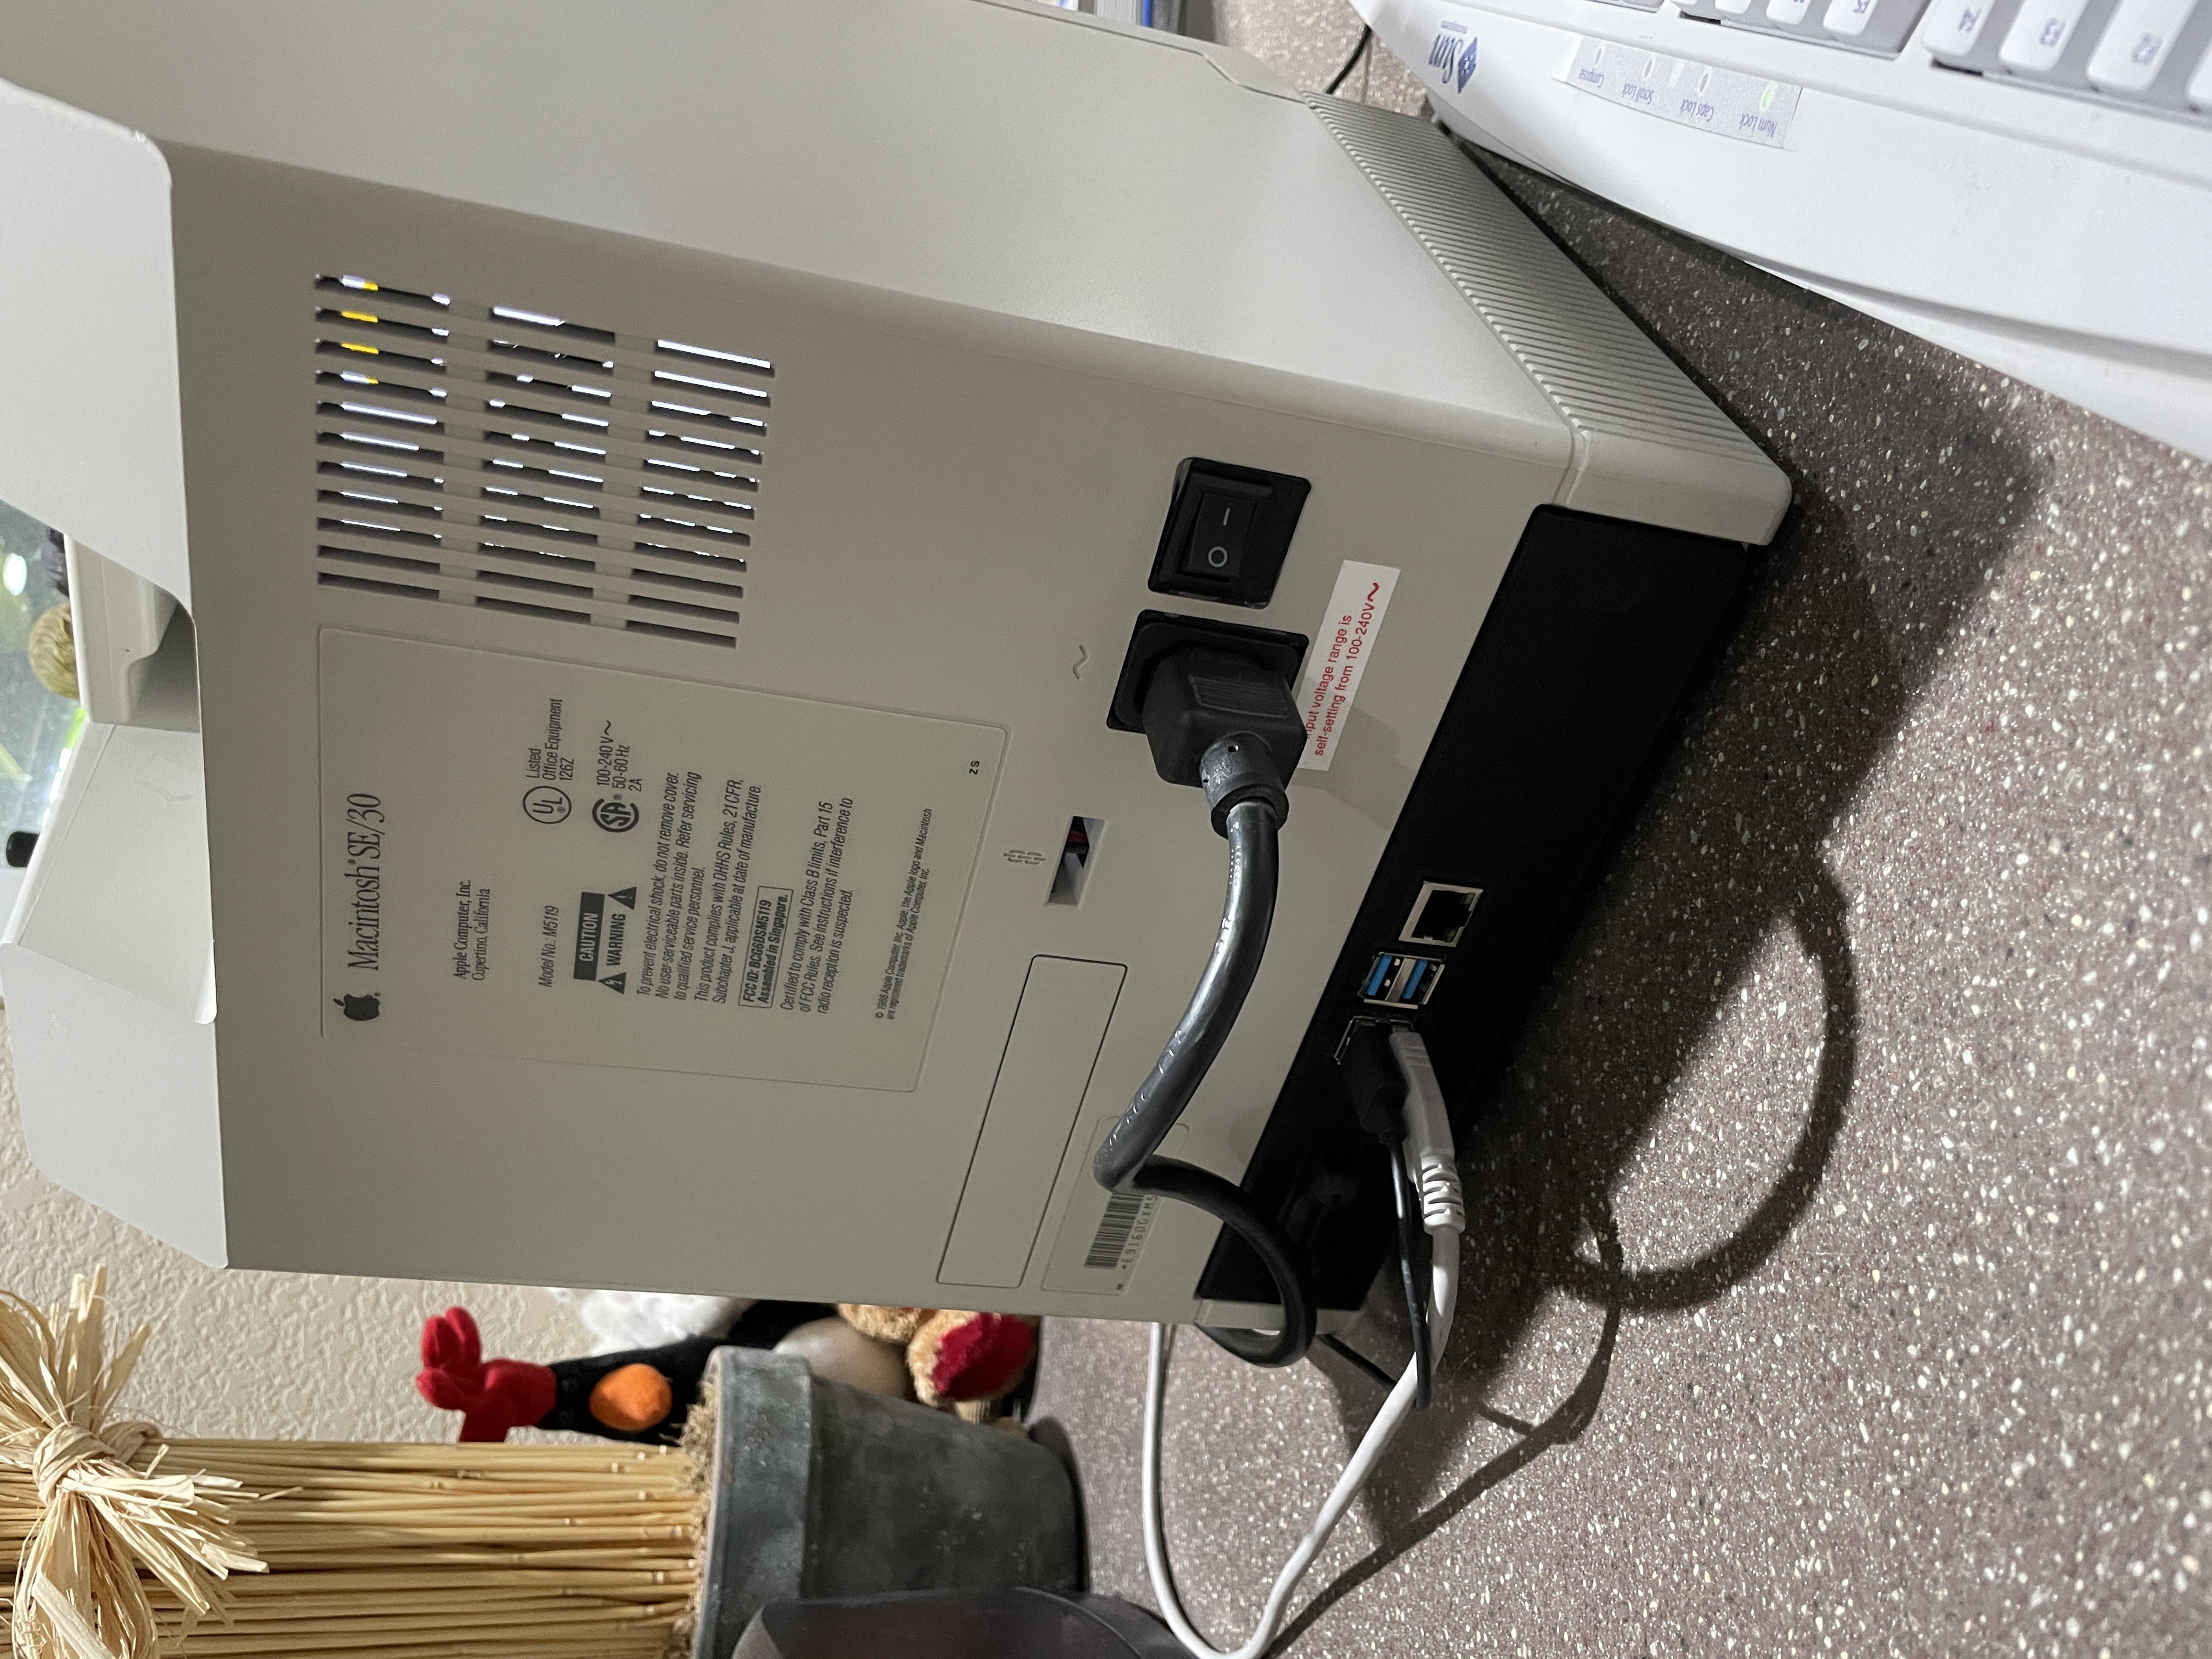
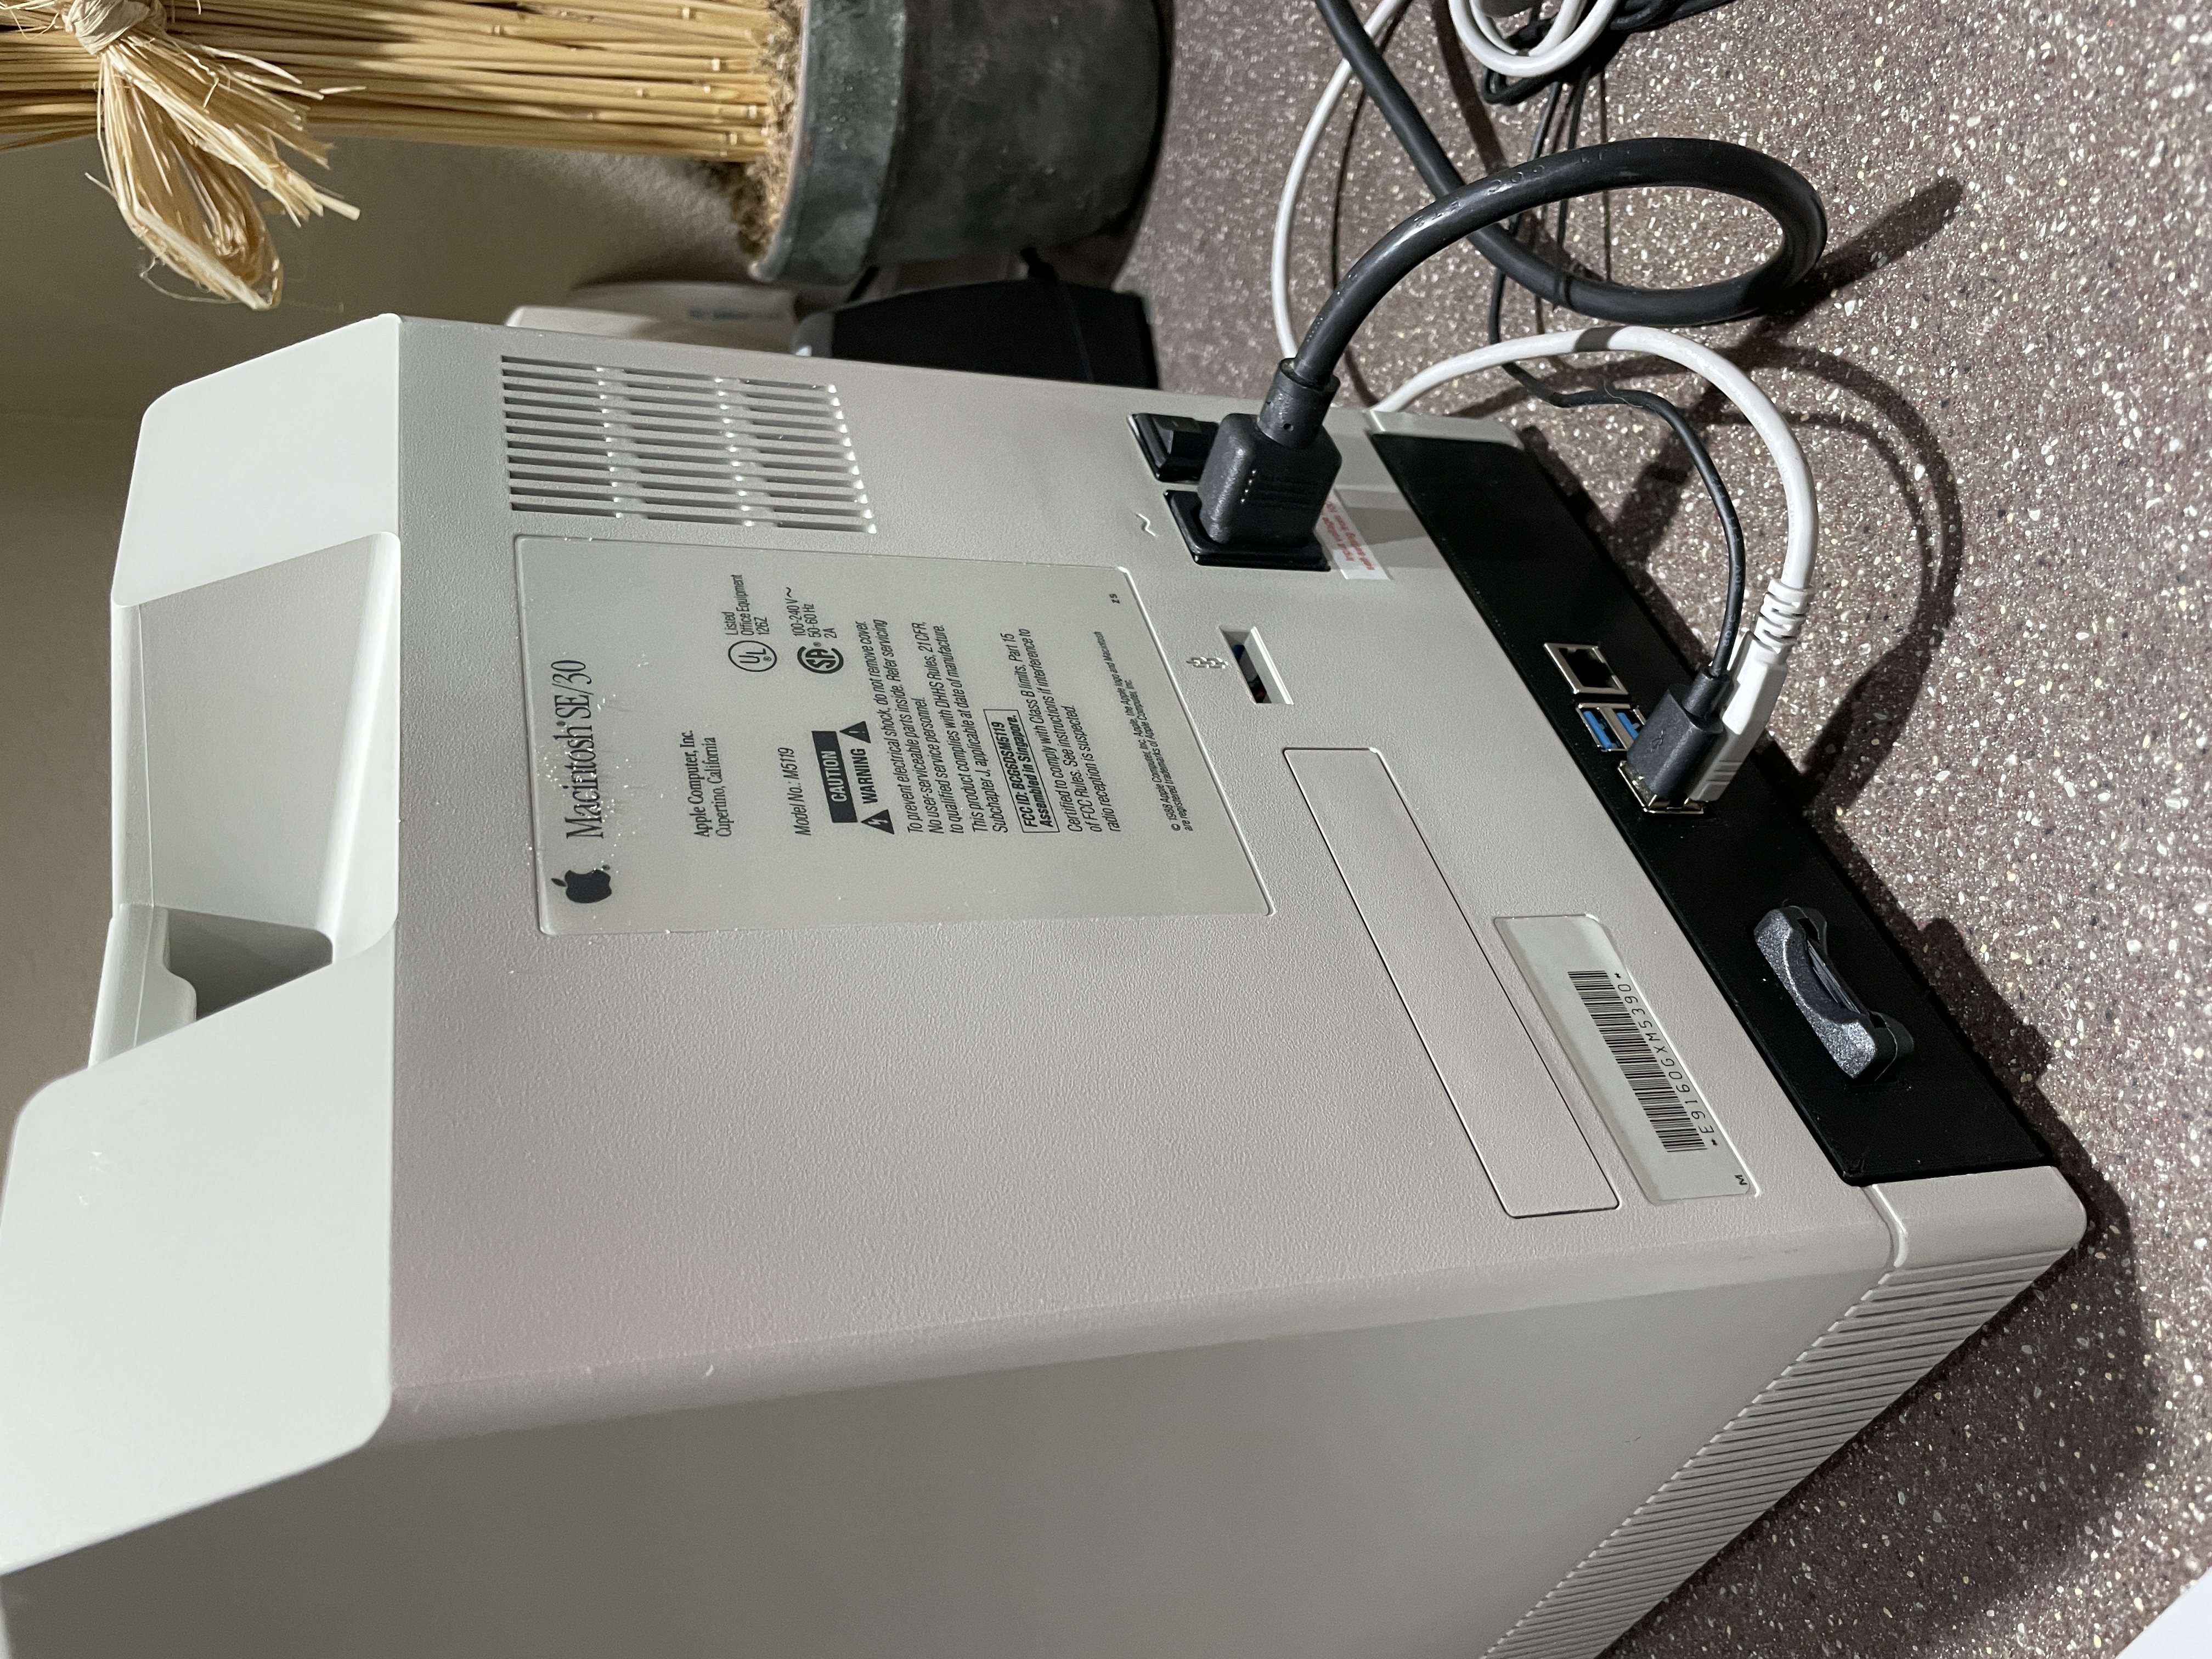
The back of the machine was an exercise in keeping the original detailing. The original AC inlet and rocker switch are reused in their original positions. The round ventilation openings on the top rear are unobstructed. The original Macintosh SE/30 ID plate is intact and reads the same model number and serial that it did when it left Singapore in 1989.
Below the ID plate, where the original DB-25 SCSI, DIN-8 serial, and ADB ports used to live, the old port cutouts have been replaced with a dark 3D-printed bezel that carries the Pi’s USB-A ports, Ethernet jack, and HDMI out. I kept that region low on the case so that your eye is drawn first to the familiar Apple-era labeling above it. From two feet away the back looks almost period-correct until you notice the USB.
The LCD Panel
The LCD came with a generic controller board that accepts HDMI input. That simplified the video path enormously. I ran a short internal HDMI cable from the Pi mounted at the back of the case to the controller board mounted behind the LCD in the front bezel. The controller autosyncs to whatever the Pi is outputting, so bringing the machine up is just a matter of powering it on and letting the desktop appear.
The LCD, controller, and my 3D-printed mounting brackets all live in the front bezel. The bezel separates cleanly from the rear of the case for service, and all of the interconnects between the front bezel and the rear of the case are plug-and-socket, so the whole machine comes apart and goes back together without hunting for loose wires.
A Floppy Drive, Almost
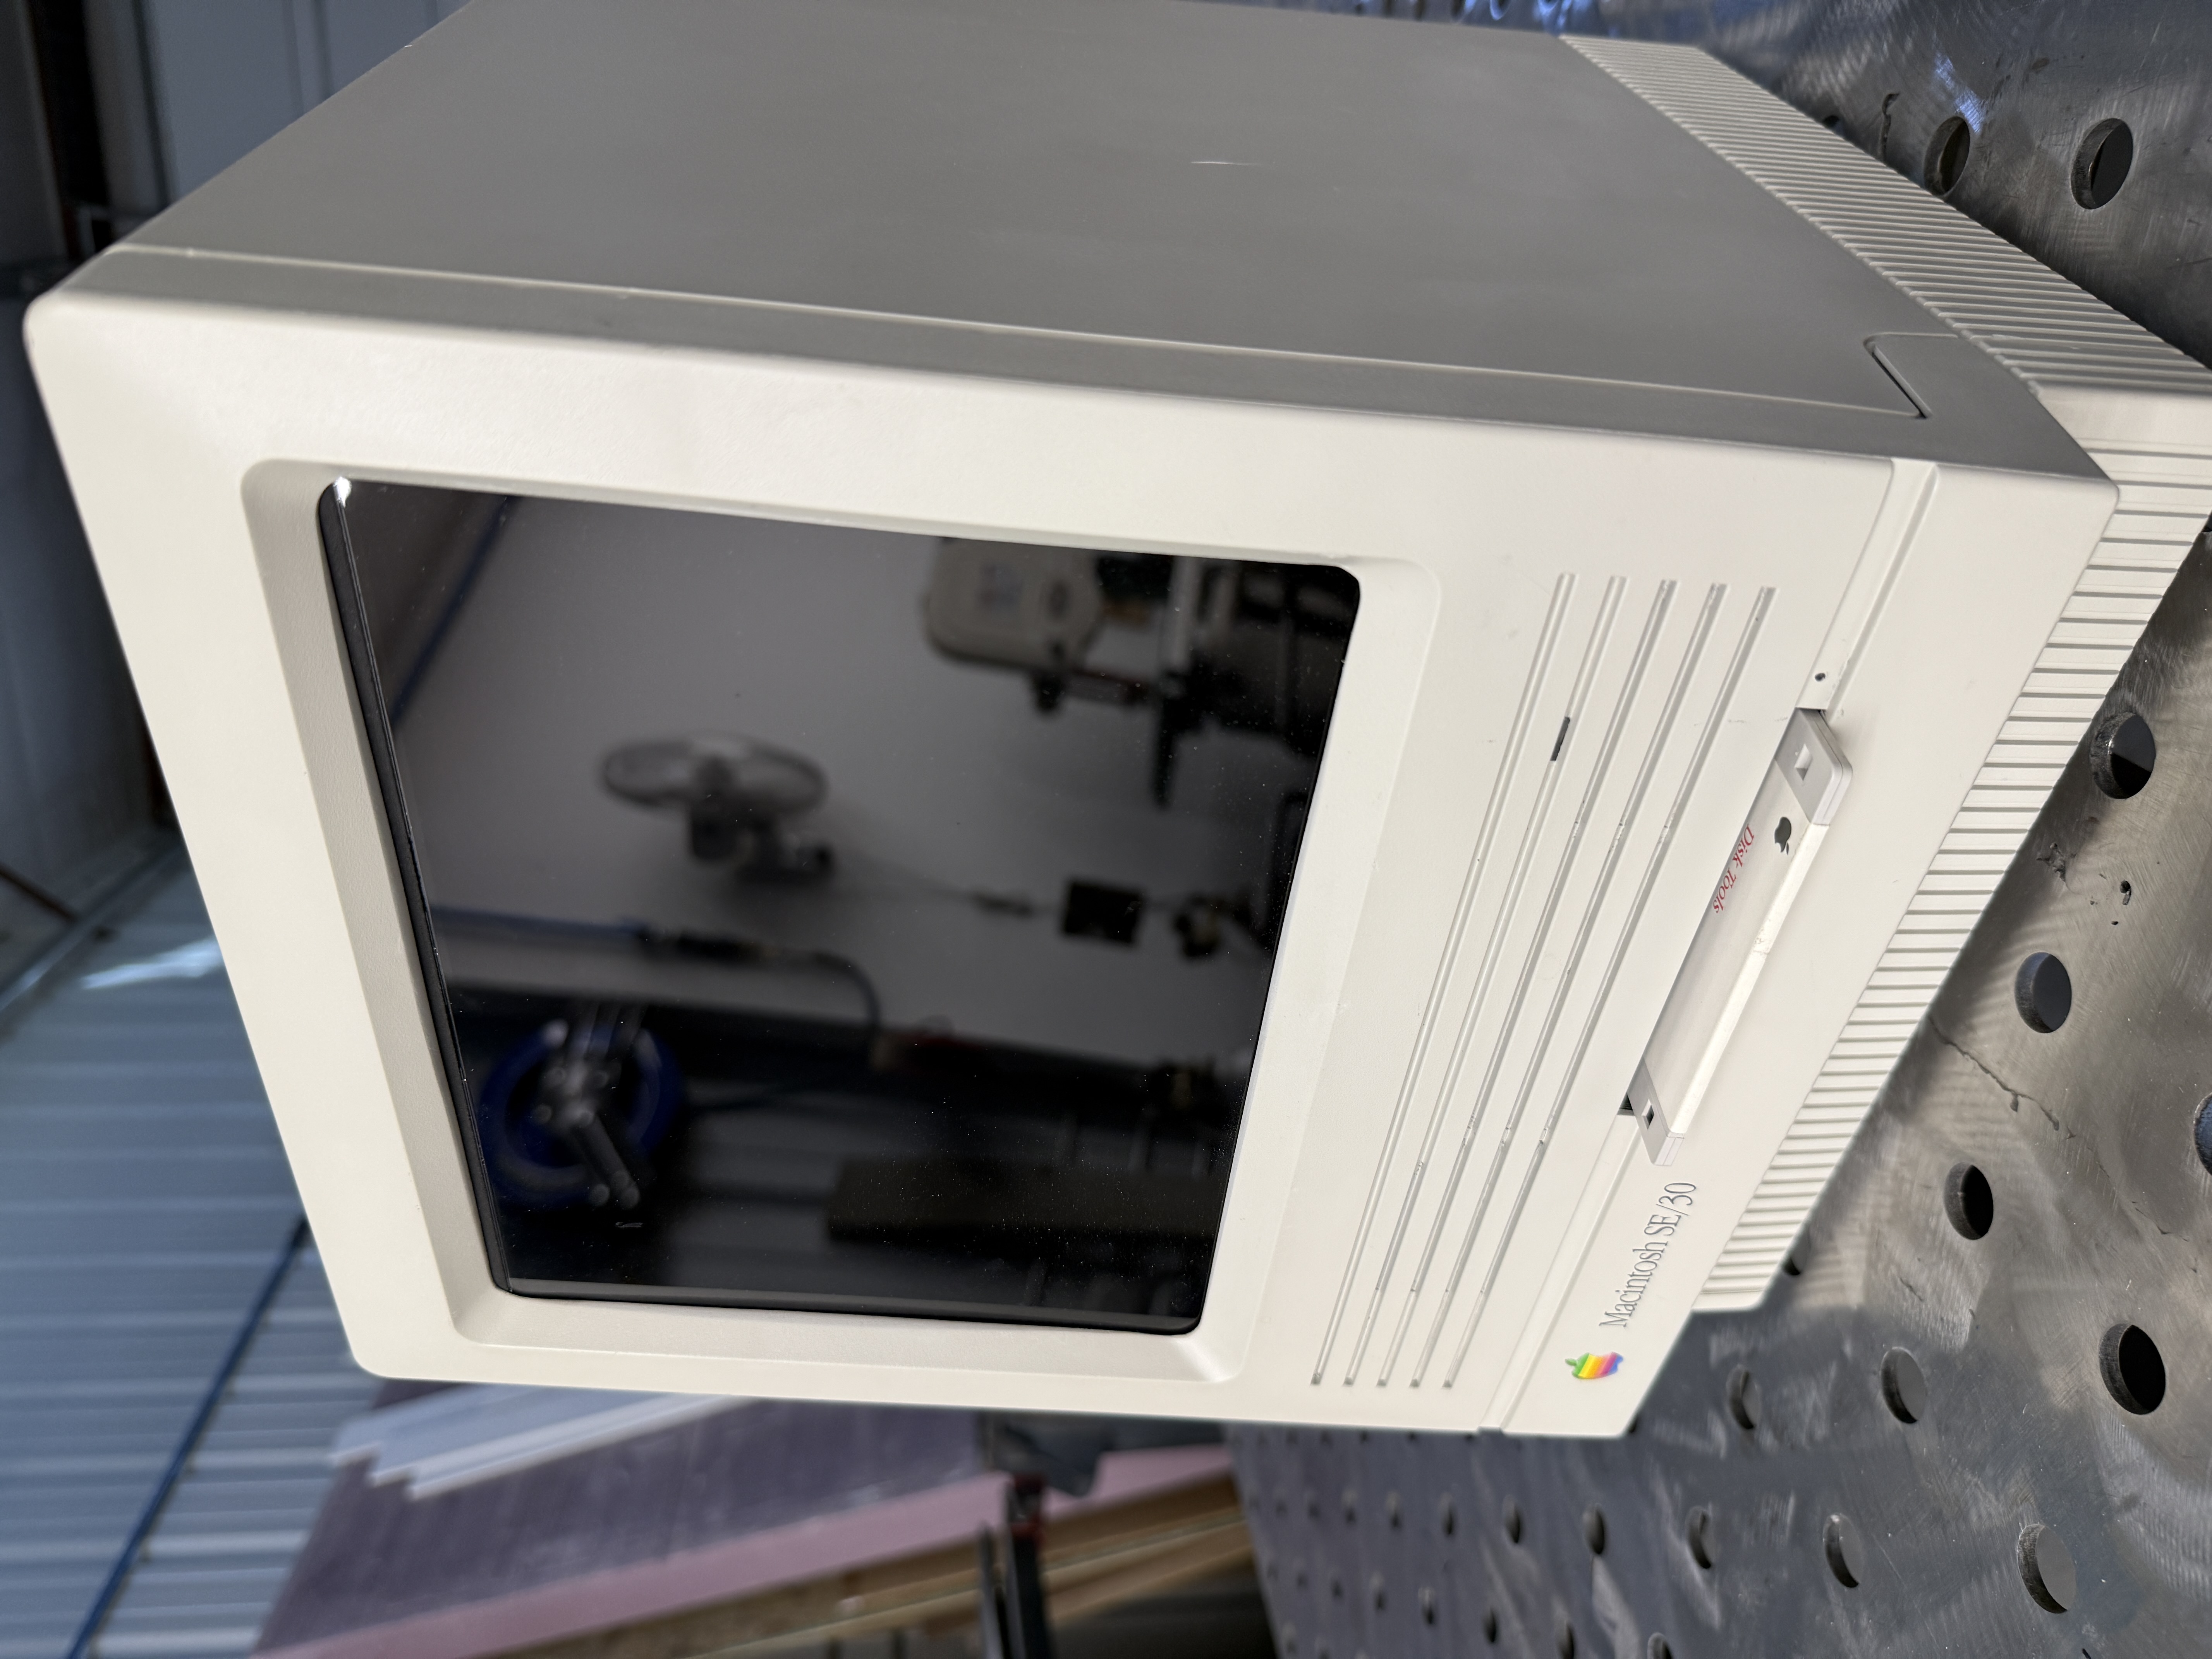
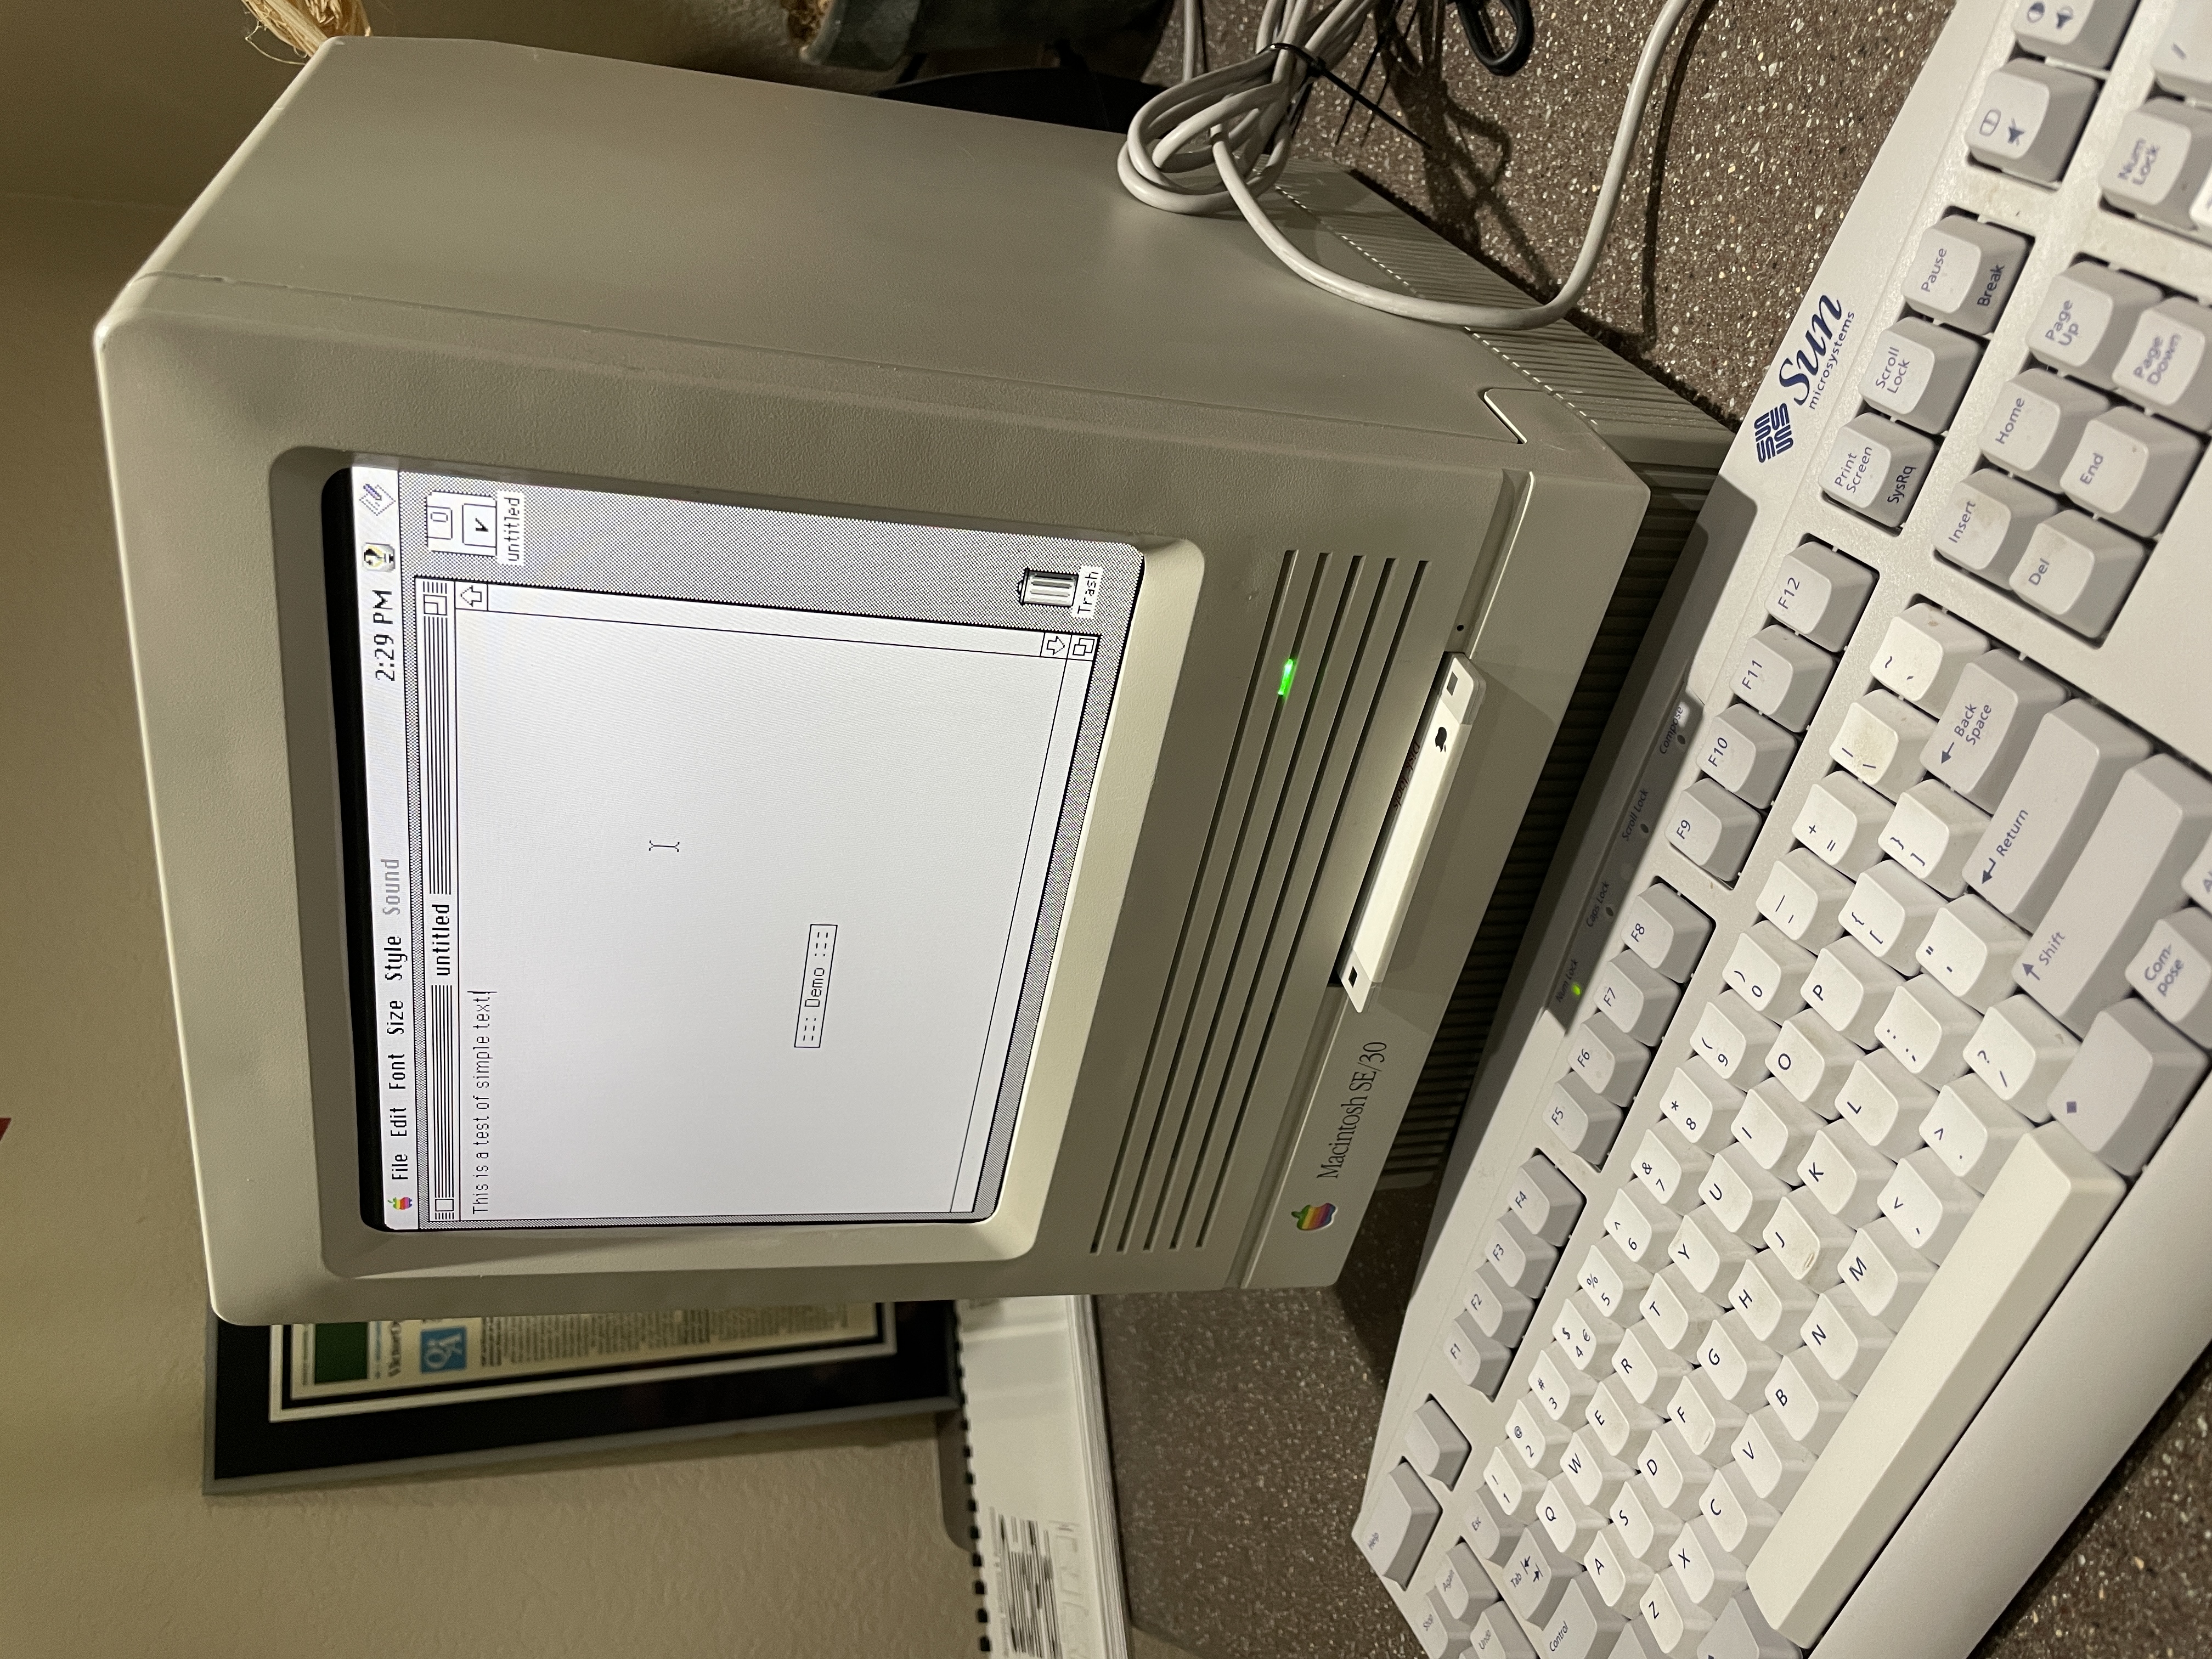
I could not bring myself to leave the floppy slot empty. The horizontal slot on the front of a compact Mac is one of its most recognizable features, and an empty rectangle felt like a concession. I designed a 3D-printed insert that holds a real 3.5-inch floppy disk with about ten percent of the disk exposed, exactly as it would appear in the original machine when a disk was loaded. It serves no function other than homage, and the part attaches to the front bezel so that the whole assembly comes apart cleanly for service.
HD Activity LED
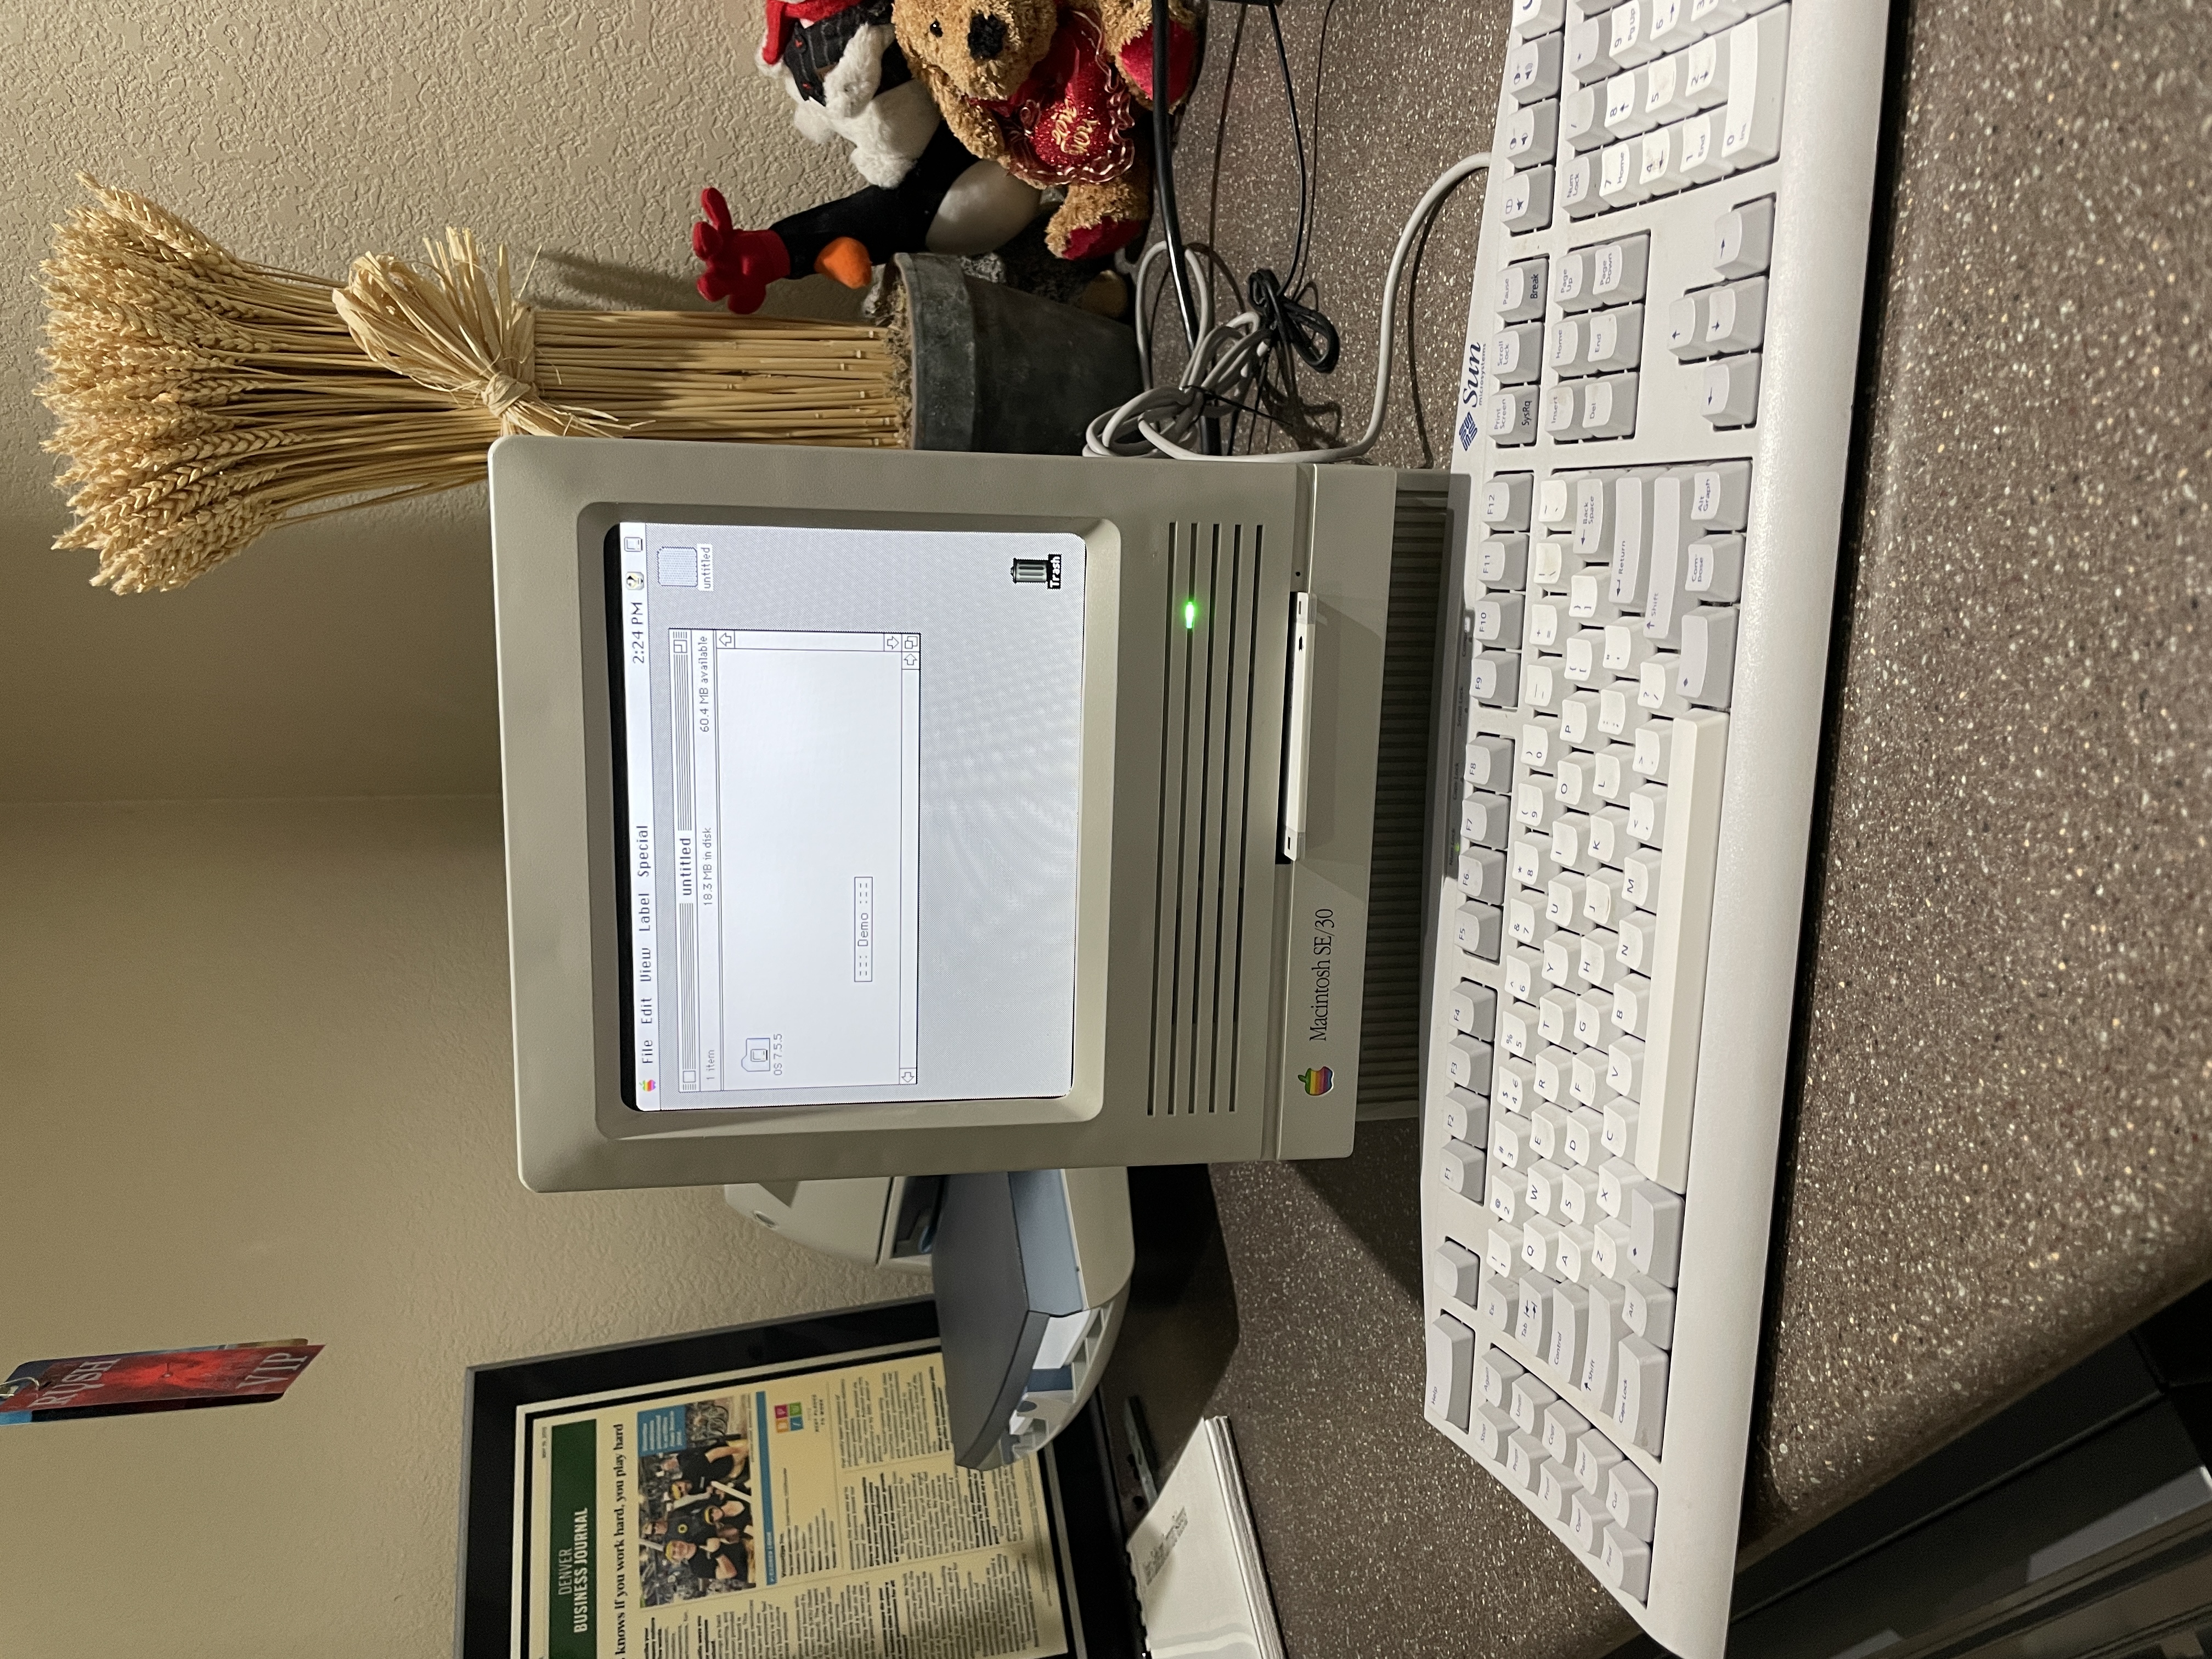
The Pi has a well-documented device tree overlay that drives a GPIO pin whenever the SD card is being accessed. I ran that signal into one channel of a small RGB LED, and tied a second channel to the 5V rail through a current-limiting resistor. The result is a dual-purpose indicator in the same location where the SE/30’s power LED used to live. The LED glows green whenever the machine is on, and flickers blue during disk activity. It is a small touch but it is one of my favorite details on the whole machine.
Keyboard and Mouse
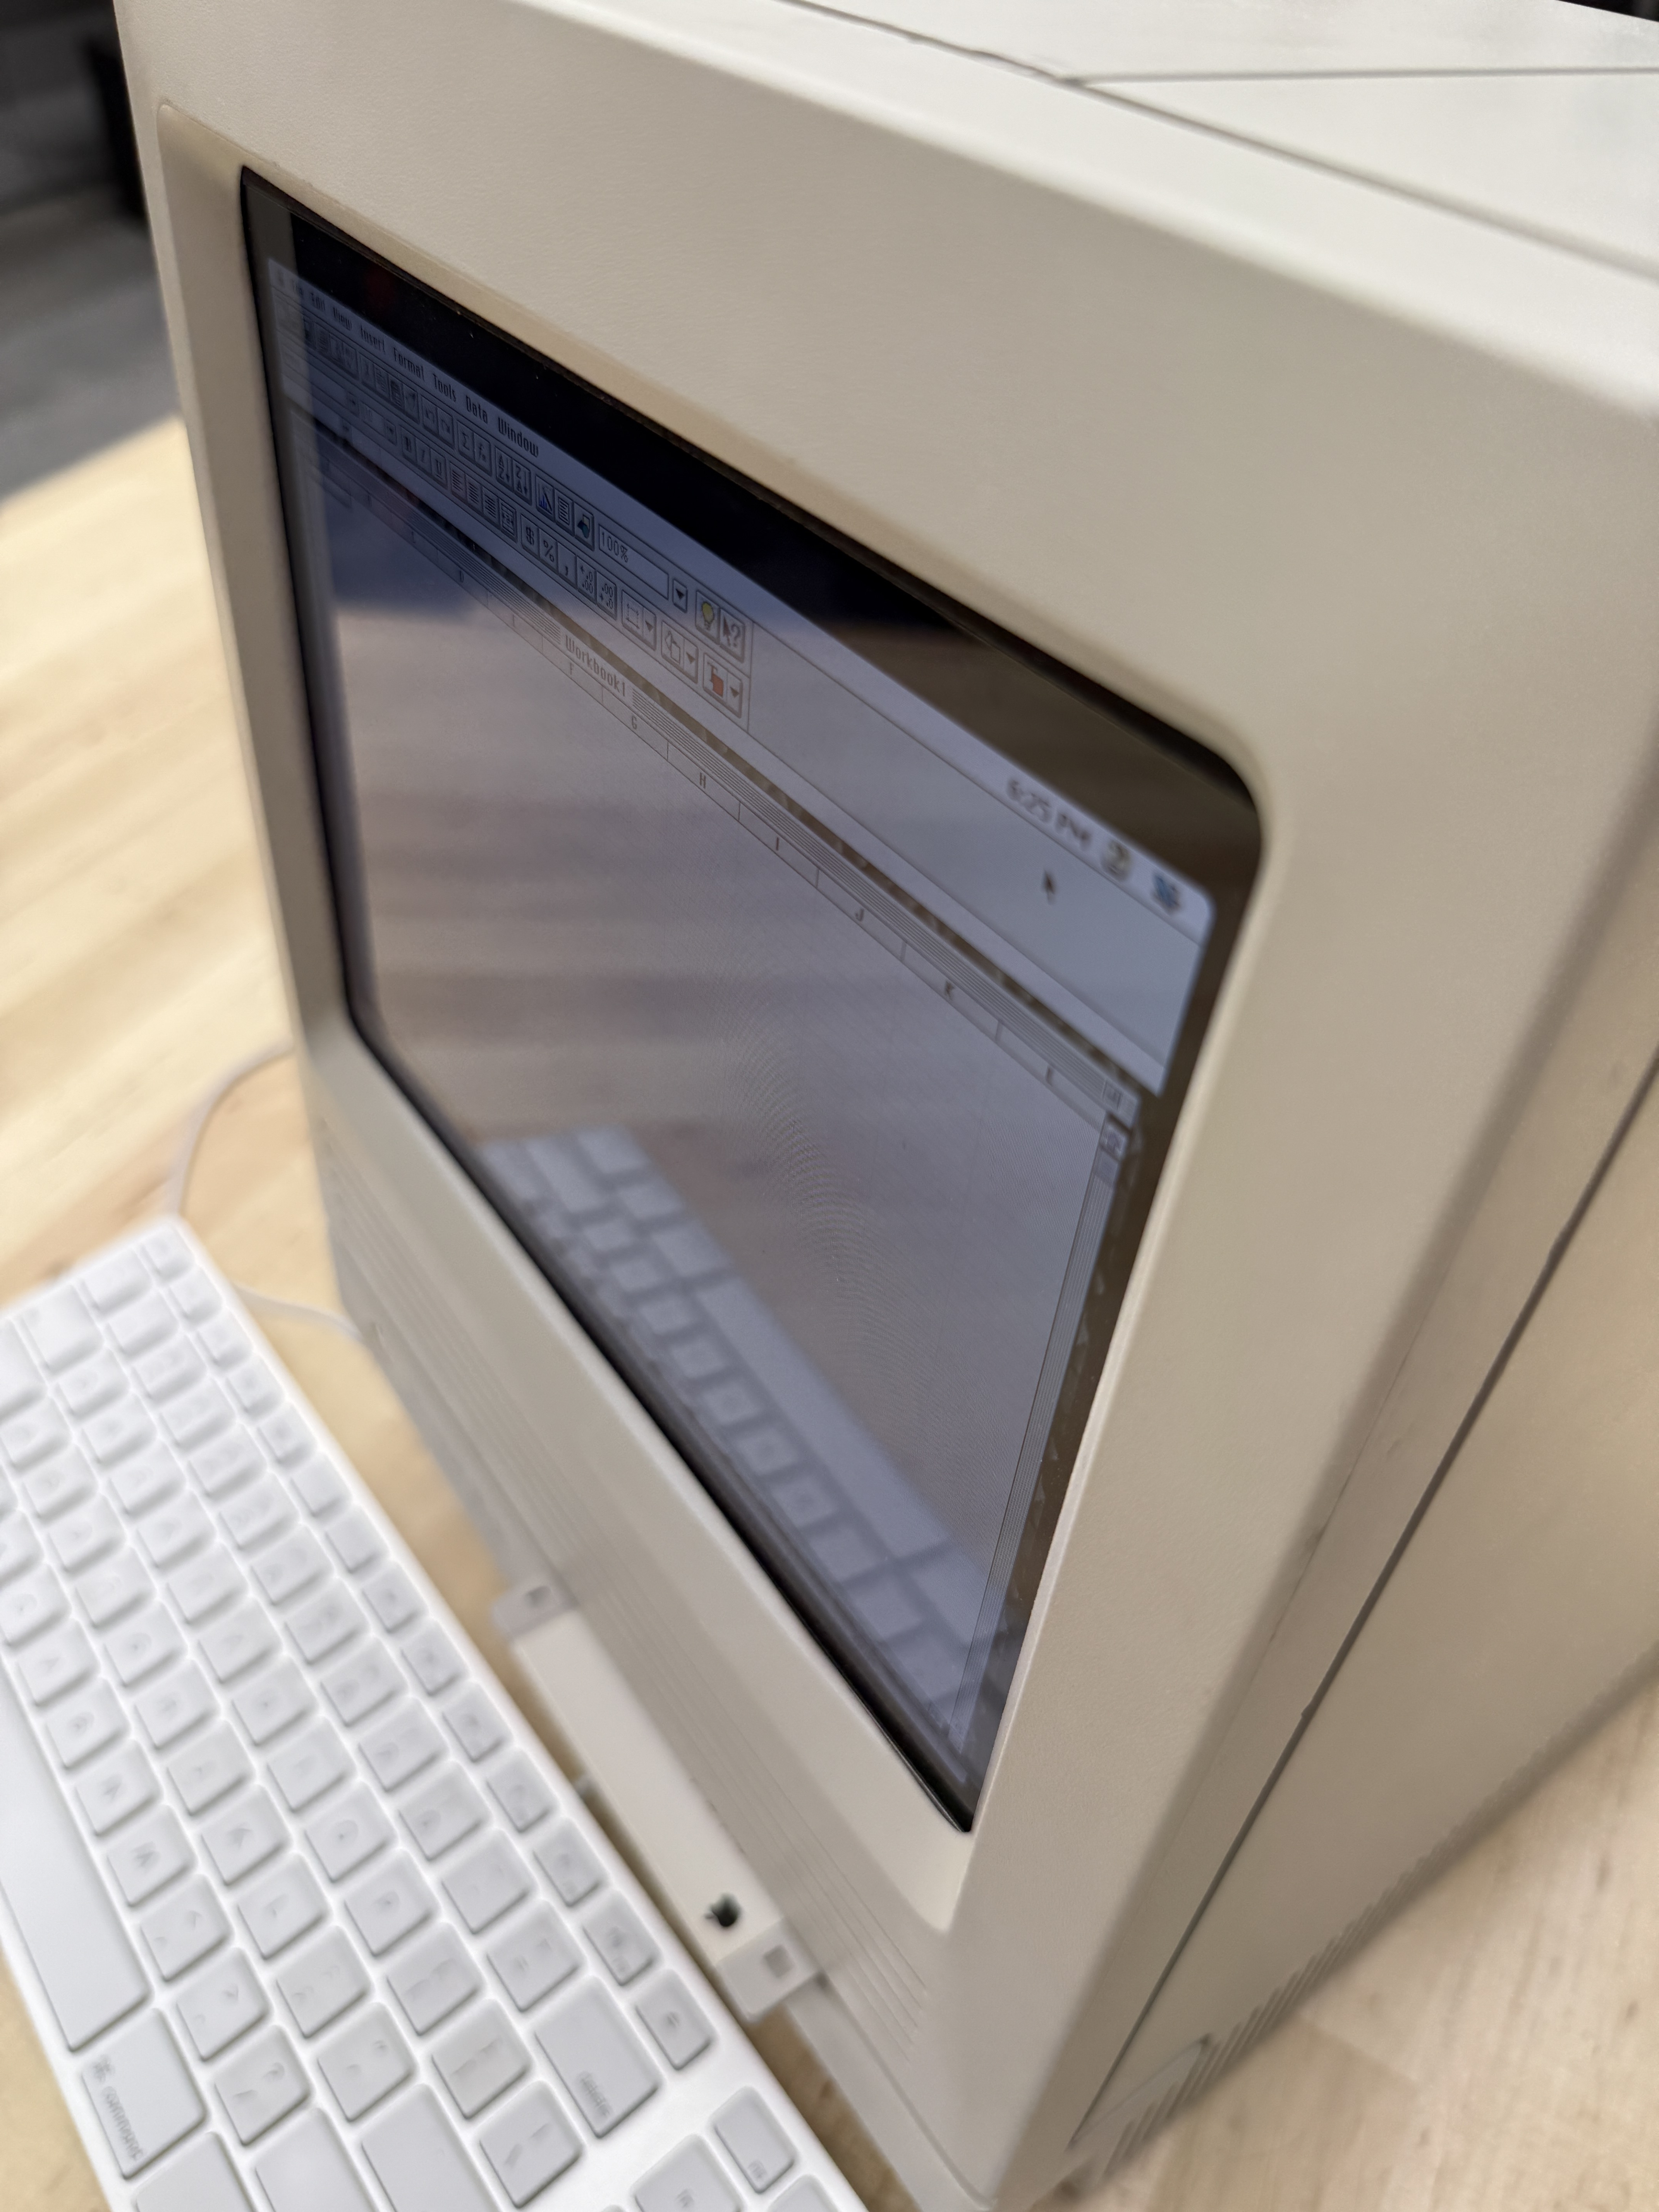
I wanted the keyboard and mouse to look at home next to the reimagined SE/30. An original Apple Extended or Apple Standard keyboard from the era has the right color and the right feel, but it ties you to ADB, which the Pi does not speak without extra hardware. Instead I found a plain white modern Apple USB keyboard and a small white USB mouse. The scale and motif of the modern keyboard turn out to match the SE/30 case surprisingly well. From a few feet away the setup reads as a compact Mac from across the decades, not a Pi-in-a-box.
Conclusion
This project was a fun diversion from the usual restoration work. Strictly speaking I did not restore anything here; I built something new out of parts of two broken machines and a Raspberry Pi. But the result sits on the shelf next to the properly restored SE/30, and the two of them together tell a better story than either one alone.
The reimagined SE/30 is fast, silent, and genuinely useful. When I want to launch something from the classic Mac library I reach for this machine, not the original. Mini vMac boots in seconds, the color LCD is a joy compared to the tiny one-bit screen, and I am not wearing out a 30-year-old CRT every time I use it.
The whole machine weighs maybe two pounds, which is always a little surprising when you pick it up. Your hands are expecting a 17-pound SE/30 and your arms overshoot. It is the kind of detail that makes me smile every time I move it from one shelf to another.
Related Articles and Links
Macintosh SE/30 Restoration - The companion project: a proper restoration of a Macintosh SE/30 with its original logic board, CRT, and analog board intact.
Macintosh Color Classic - Apple’s first color compact Mac, and the closest Apple ever came to shipping a factory color SE/30.
Mini vMac - The emulator at the heart of this build. Covers the Macintosh Plus, SE, Classic, and Mac II variants.
Basilisk II - The 680x0 emulator for System 7 through Mac OS 8.1, when you need to go beyond what Mini vMac covers.
SheepShaver - PowerPC Macintosh emulator for Mac OS 7.5.2 through 9.0.4, for late-90s classic Mac software.
Raspberry Pi Revives a Macintosh SE/30 Shell - The Raspberry Pi Foundation’s writeup of a similar SE/30 reimagining project.
Gallery